No Bake Peanut Butter Oreo Bars – Easy, Creamy, and Crowd-Pleasing

No oven, no hassle, just pure peanut butter and Oreo bliss. These bars are the kind of treat you can pull together in minutes and still impress everyone at the table. They’re rich, creamy, and perfectly crunchy in all the right places.
If you love the classic peanut butter and chocolate combo, this recipe might become your new go-to. It’s great for parties, lunchbox treats, or late-night cravings when you want something sweet without turning on the oven.
No Bake Peanut Butter Oreo Bars
Ingredients
- 36 Oreo cookies (regular, not Double Stuf), divided
- 1/2 cup unsalted butter (melted), plus extra for greasing if needed
- 1 cup creamy peanut butter (not natural/runny style)
- 1 cup powdered sugar
- 1 teaspoon vanilla extract
- 1/4 teaspoon fine salt (skip if using salted butter)
- 1 1/2 cups semisweet chocolate chips
- 2 tablespoons peanut butter (for the chocolate topping)
- Optional add-ins: 1/2 cup chopped roasted peanuts or mini chocolate chips
Instructions
- Prep the pan: Line an 8x8-inch baking pan with parchment paper, leaving overhang for easy lifting. Lightly grease the sides if your parchment doesn’t cover them.
- Crush most of the Oreos: Place 28 Oreos in a large zip-top bag and crush with a rolling pin until you have fine crumbs with a few small pieces. You can also use a food processor. Reserve the remaining 8 Oreos for chunky mix-ins on top or in the base.
- Make the peanut butter base: In a medium bowl, stir together the melted butter, 1 cup peanut butter, powdered sugar, vanilla, and salt until smooth. Fold in the Oreo crumbs until evenly combined. If using, mix in peanuts or mini chips.
- Press into the pan: Transfer the mixture to the prepared pan. Press it down firmly and evenly with a spatula or the bottom of a measuring cup. Aim for a compact, level layer so the bars hold their shape.
- Make the chocolate topping: In a microwave-safe bowl, heat the chocolate chips and 2 tablespoons peanut butter in 20–30 second bursts, stirring between each, until smooth and glossy. Alternatively, melt gently on the stovetop using a double boiler.
- Top and decorate: Pour the melted chocolate over the peanut butter layer and spread evenly. Roughly chop the remaining 8 Oreos and sprinkle over the top. Press them in lightly so they stick.
- Chill to set: Refrigerate for 2–3 hours, or until the chocolate is firm and the base is set. For faster setting, you can chill in the freezer for 45–60 minutes, but don’t leave them frozen for too long or cutting can get tricky.
- Slice and serve: Use the parchment overhang to lift the whole slab out of the pan. Warm a sharp knife under hot water, wipe it dry, and slice into bars or squares. Clean the knife between cuts for neat edges.
What Makes This Recipe So Good
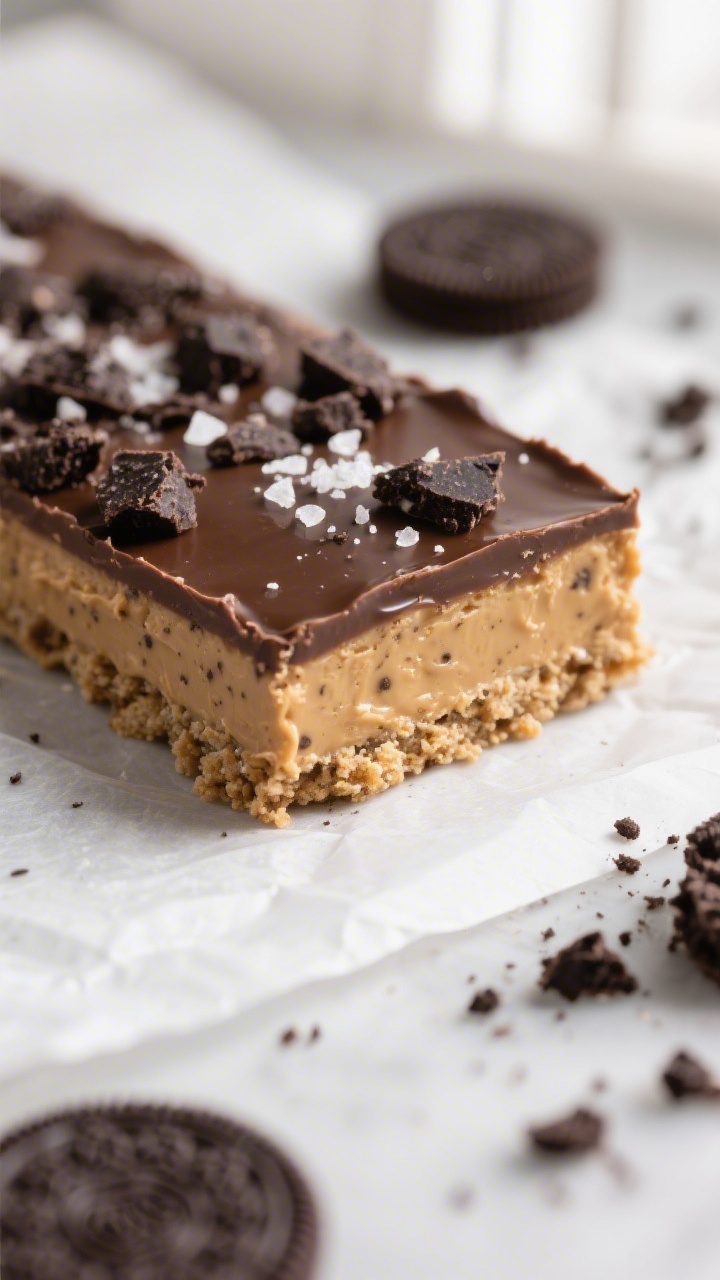
- Zero baking required: Everything sets in the fridge, so it’s perfect for hot days or quick prep.
- Foolproof ingredients: Peanut butter, Oreos, butter, and chocolate chips—nothing fancy, all delicious.
- Texture heaven: A creamy peanut butter base with crunchy Oreo bits and a smooth chocolate top.
- Flexible and forgiving: Swap in gluten-free cookies or use different nut butters—it still works.
- Make-ahead friendly: These bars taste even better after chilling, and they hold up well for days.
Ingredients
- 36 Oreo cookies (regular, not Double Stuf), divided
- 1/2 cup unsalted butter (melted), plus extra for greasing if needed
- 1 cup creamy peanut butter (not natural/runny style)
- 1 cup powdered sugar
- 1 teaspoon vanilla extract
- 1/4 teaspoon fine salt (skip if using salted butter)
- 1 1/2 cups semisweet chocolate chips
- 2 tablespoons peanut butter (for the chocolate topping)
- Optional add-ins: 1/2 cup chopped roasted peanuts or mini chocolate chips
Instructions
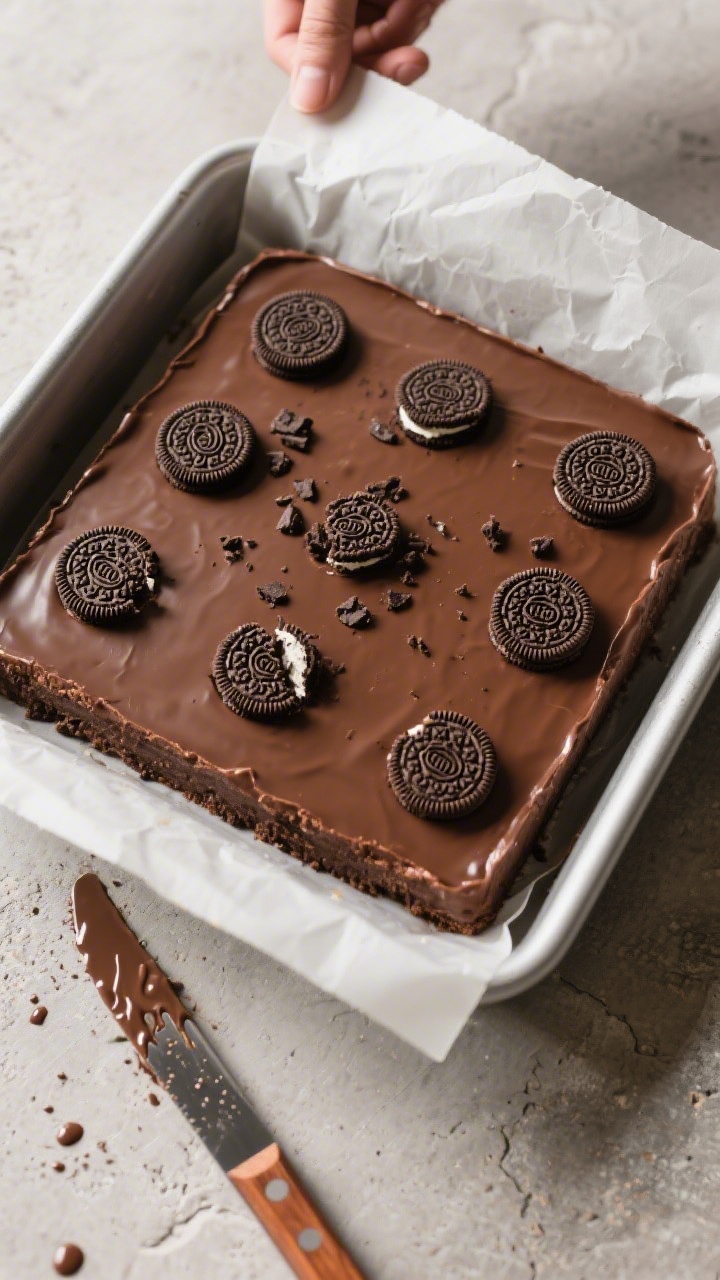
- Prep the pan: Line an 8×8-inch baking pan with parchment paper, leaving overhang for easy lifting. Lightly grease the sides if your parchment doesn’t cover them.
- Crush most of the Oreos: Place 28 Oreos in a large zip-top bag and crush with a rolling pin until you have fine crumbs with a few small pieces.You can also use a food processor. Reserve the remaining 8 Oreos for chunky mix-ins on top or in the base.
- Make the peanut butter base: In a medium bowl, stir together the melted butter, 1 cup peanut butter, powdered sugar, vanilla, and salt until smooth. Fold in the Oreo crumbs until evenly combined.If using, mix in peanuts or mini chips.
- Press into the pan: Transfer the mixture to the prepared pan. Press it down firmly and evenly with a spatula or the bottom of a measuring cup. Aim for a compact, level layer so the bars hold their shape.
- Make the chocolate topping: In a microwave-safe bowl, heat the chocolate chips and 2 tablespoons peanut butter in 20–30 second bursts, stirring between each, until smooth and glossy.Alternatively, melt gently on the stovetop using a double boiler.
- Top and decorate: Pour the melted chocolate over the peanut butter layer and spread evenly. Roughly chop the remaining 8 Oreos and sprinkle over the top. Press them in lightly so they stick.
- Chill to set: Refrigerate for 2–3 hours, or until the chocolate is firm and the base is set.For faster setting, you can chill in the freezer for 45–60 minutes, but don’t leave them frozen for too long or cutting can get tricky.
- Slice and serve: Use the parchment overhang to lift the whole slab out of the pan. Warm a sharp knife under hot water, wipe it dry, and slice into bars or squares. Clean the knife between cuts for neat edges.
Keeping It Fresh
- Storage: Keep bars in an airtight container in the fridge for up to 1 week.They’re firm when cold and softer at room temp.
- Room temperature: If your kitchen is cool, they can sit out for a few hours during serving. Warm rooms may soften the chocolate top.
- Freezing: Freeze sliced bars for up to 2 months. Layer with parchment to prevent sticking.Thaw in the fridge for best texture.
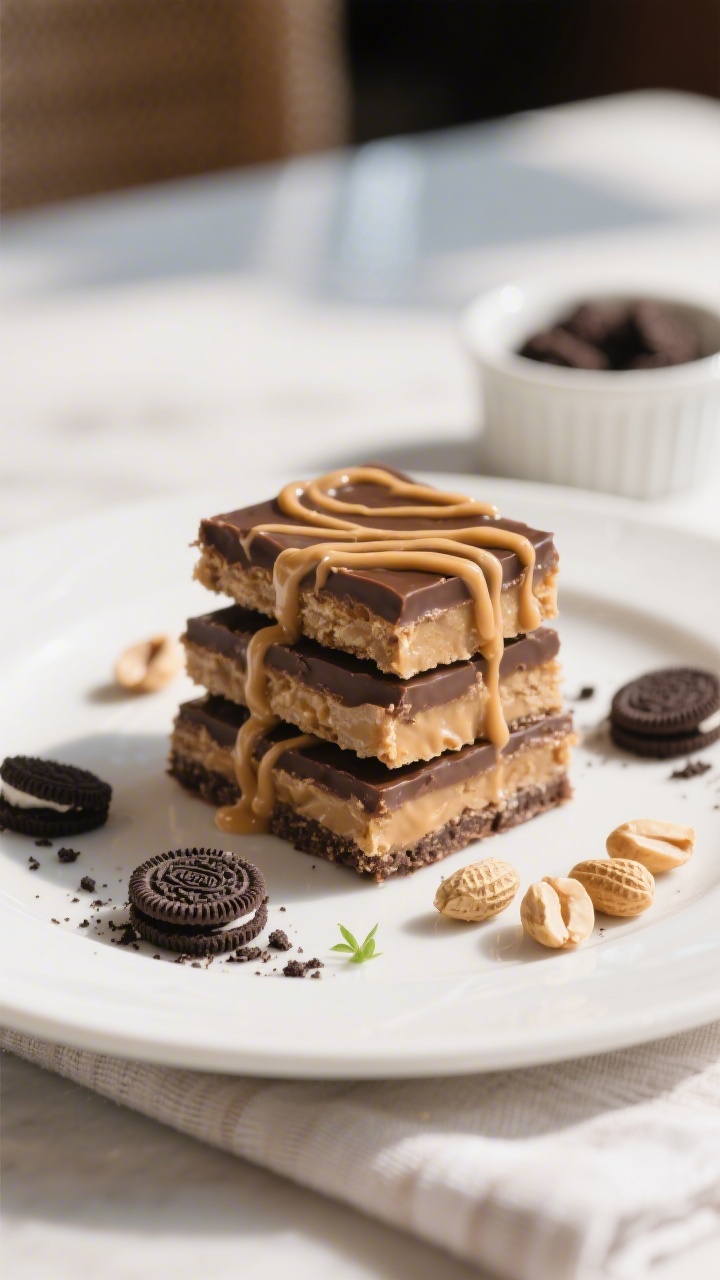
Benefits of This Recipe
- Quick and low-effort: Minimal dishes, no baking, and short prep time.
- Budget-friendly: Pantry staples make a big batch for sharing.
- Crowd-pleasing flavors: Peanut butter and chocolate with a familiar cookie crunch.
- Great for gifting and parties: Easy to transport and slice neatly for platters.
- Customizable: Adjust sweetness, texture, and mix-ins to suit your taste.
Pitfalls to Watch Out For
- Using natural peanut butter: The runny texture can make the base oily or too soft. Use a standard creamy variety for best results.
- Crumbs too coarse: Very large chunks can stop the base from binding. Aim for mostly fine crumbs with a few small bits.
- Overheating the chocolate: It can seize or get grainy.Heat gently and stir often.
- Skipping the chill time: Cutting too soon leads to messy layers. Let the bars fully set.
- Warm kitchen issues: If it’s hot, keep the bars chilled until serving to avoid a soft, melty top.
Variations You Can Try
- Gluten-free swap: Use gluten-free chocolate sandwich cookies instead of Oreos.
- Different nut butters: Try almond or cashew butter. If thinner, add an extra 2–4 tablespoons powdered sugar to help it set.
- Double chocolate: Stir 1/4 cup cocoa powder into the base and use dark chocolate chips on top.
- Salted crunch: Sprinkle flaky sea salt over the chocolate layer before it sets.
- Mousse-style top: Fold a little whipped cream into the melted chocolate (once it cools slightly) for a softer, truffle-like finish.
- Mint twist: Add 1/2 teaspoon peppermint extract to the chocolate layer and use mint sandwich cookies.
- Peanut butter swirl: Drizzle warmed peanut butter over the chocolate topping and swirl with a toothpick.
- S’mores vibe: Mix mini marshmallows into the base and sprinkle crushed graham crackers on top.
FAQ
Can I use natural peanut butter?
Natural peanut butter tends to separate and is usually looser, which can make the base oily or too soft.
If that’s all you have, stir it very well and add an extra 2–4 tablespoons powdered sugar to firm things up. Expect a slightly different texture.
Do I need a food processor for the Oreos?
No. A zip-top bag and rolling pin (or a heavy pan) work fine.
Just aim for mostly fine crumbs so the base presses together neatly.
How do I cut clean slices?
Chill the bars until fully set, then use a sharp knife warmed under hot water and wiped dry. Press down firmly rather than sawing, and clean the blade between cuts.
Can I make these dairy-free?
Yes. Use dairy-free chocolate chips and a plant-based butter.
Most store-brand chocolate sandwich cookies are dairy-free, but check the label to be sure.
Why is my chocolate topping cracking?
If the base is very firm and the chocolate is very cold, it can crack when sliced. Let the bars sit at room temperature for 5–10 minutes before cutting, and use a warm knife.
What size pan works best?
An 8×8-inch pan gives thicker bars. A 9×9-inch pan makes slightly thinner pieces.
For a 9×13-inch pan, increase all ingredients by about 50% for similar thickness.
Can I reduce the sugar?
You can cut the powdered sugar in the base to 3/4 cup. The texture will be a bit softer and less sweet, but still tasty and stable after chilling.
How long do they take to set?
Plan for about 2–3 hours in the fridge. If you’re in a rush, chill in the freezer for 45–60 minutes, then move to the fridge to hold.
Final Thoughts
No bake peanut butter Oreo bars are simple, satisfying, and nearly impossible to mess up.
With a handful of pantry staples, you get a rich peanut butter base, a glossy chocolate top, and that unmistakable Oreo crunch.
Keep a batch in the fridge for easy desserts, after-school snacks, or last-minute guests.
They’re the kind of treat that feels special without a lot of work—and that’s the sweet spot.
Printable Recipe Card
Want just the essential recipe details without scrolling through the article? Get our printable recipe card with just the ingredients and instructions.