Garlic Herb Focaccia – Soft, Fragrant, and Perfect for Sharing

Focaccia is one of those breads that feels impressive but is surprisingly simple to make at home.
This version is rich with olive oil, garlic, and fresh herbs, giving you a soft, airy crumb and a golden, crisp edge. It’s perfect for a side, a snack, or the base of a great sandwich.
If you’re new to bread baking, this is a forgiving recipe that rewards a little patience. And if you’ve made it before, consider this your go-to method for consistent results.

Garlic Herb Focaccia - Soft, Fragrant, and Perfect for Sharing
Ingredients
- All-purpose flour (4 cups / 500 g)
- Warm water (2 cups / 480 ml, around 100°F/38°C)
- Instant or active dry yeast (2 1/4 tsp / 7 g)
- Granulated sugar or honey (1 tsp) to feed the yeast
- Kosher salt (2 tsp for dough, plus flaky salt for topping)
- Extra-virgin olive oil (1/3 cup for dough, plus more for pan and topping)
- Fresh garlic (3–4 cloves, finely minced)
- Fresh herbs (2–3 tbsp chopped rosemary, thyme, and/or parsley)
- Optional toppings: cherry tomatoes, thin red onion, olives, grated Parmesan, crushed red pepper
Instructions
- Bloom the yeast (if using active dry): In a large bowl, mix warm water with sugar or honey and sprinkle in the yeast. Let it sit for 5–10 minutes until foamy. If using instant yeast, you can skip blooming and add it directly to the flour.
- Make the dough: Add flour and salt to the bowl. Mix with a wooden spoon or spatula until a shaggy dough forms. Drizzle in 2 tablespoons of olive oil and fold to combine. The dough will be sticky—this is good.
- First rise: Cover the bowl with plastic wrap or a damp towel and let it rise at room temperature for 60–90 minutes, or until doubled.
- Optional cold ferment for flavor: For deeper flavor and better structure, transfer the covered dough to the fridge for 8–24 hours after the first 30–60 minutes of rising. If you do this, let it warm up for 30–45 minutes before the next step.
- Prepare the pan: Generously coat a 9x13-inch baking pan or a large sheet pan with 2–3 tablespoons of olive oil. Don’t skimp; this creates a crisp, well-fried bottom.
- Stretch and rest: Turn the dough into the pan. With oiled hands, gently stretch it toward the edges. If it springs back, let it rest for 10 minutes, then stretch again. Repeat until it reaches the corners or nearly fills the pan.
- Make garlic-herb oil: In a small bowl, mix 3 tablespoons olive oil with minced garlic and the chopped herbs. Let it sit while the dough rests to infuse the oil.
- Second rise: Cover the pan lightly and let the dough puff for 30–45 minutes, until slightly jiggly and airy.
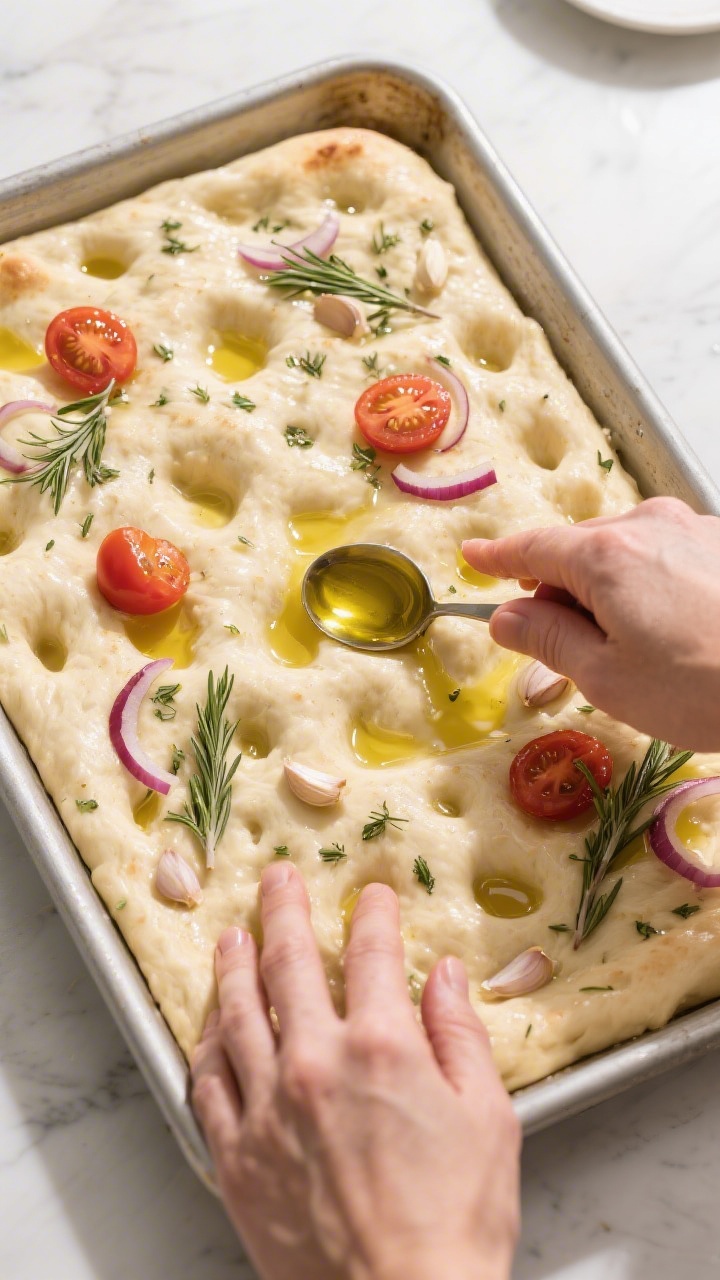
- Dimple and top: Preheat the oven to 425°F (220°C). With well-oiled fingers, press straight down into the dough to make deep dimples all over—don’t be shy. Spoon the garlic-herb oil evenly over the surface. Sprinkle with flaky salt. Add any optional toppings.
- Bake: Bake for 20–25 minutes, until the top is golden and the edges are crisp. If you like deeper color, go to 27–30 minutes, watching closely.
- Finish with oil: Right out of the oven, brush or drizzle a little more olive oil over the top for shine and flavor. Cool in the pan for 10 minutes, then transfer to a rack.
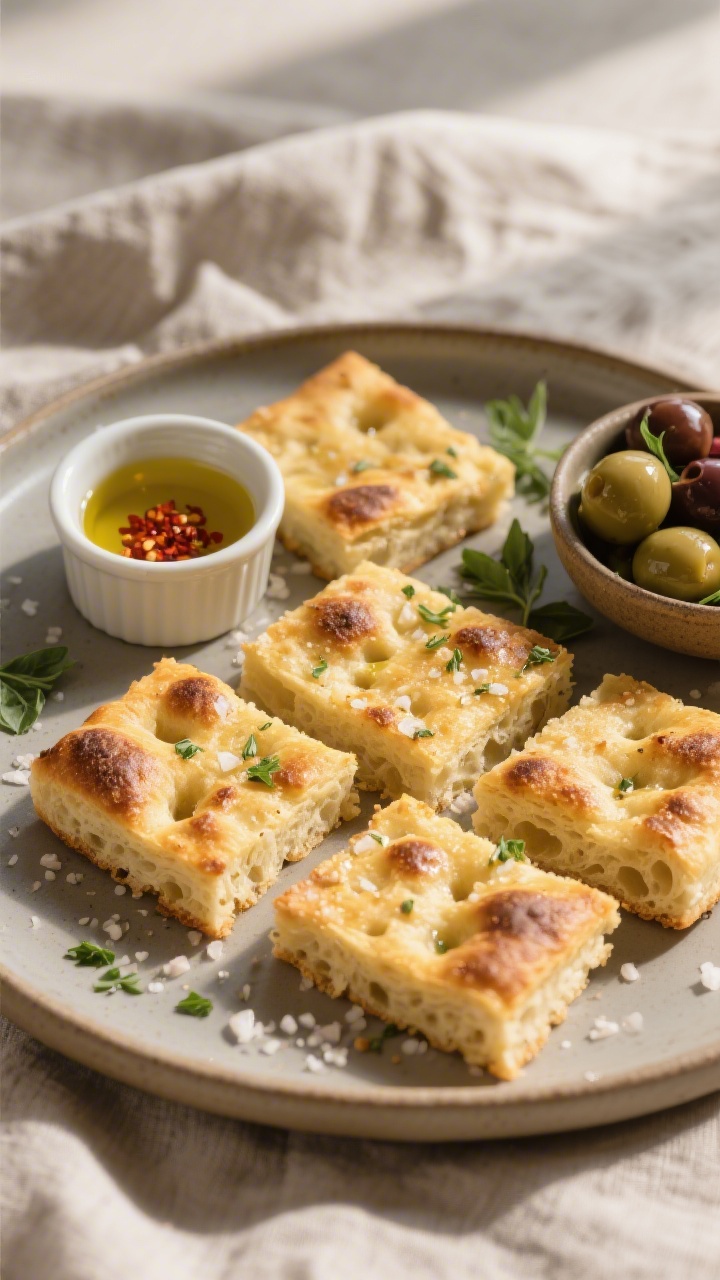
- Serve: Cut into squares or strips. Serve warm on its own, with soup, or alongside a simple salad.
Why This Recipe Works
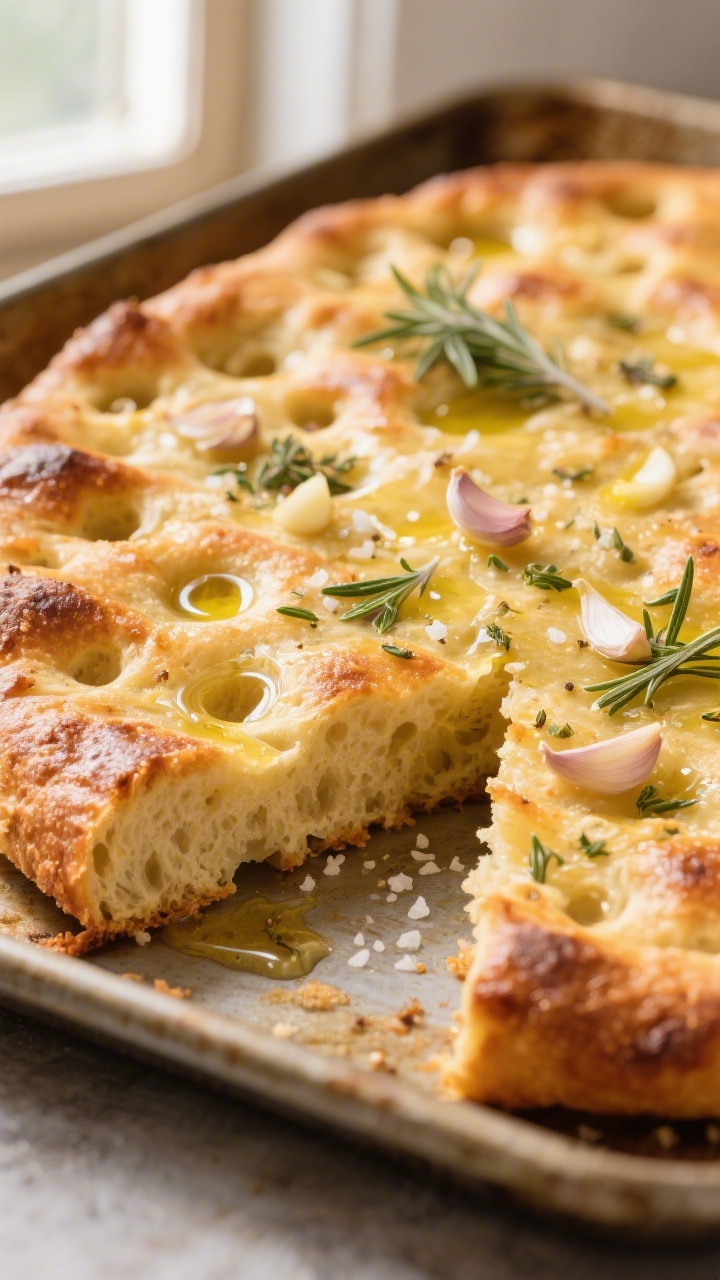
High hydration dough creates an open, airy crumb without complicated shaping. The dough is wet, but that’s what leads to those beautiful bubbles.
Olive oil is used generously.
It enriches the dough, keeps it tender, and helps the crust turn crisp.
Cold fermentation (even a short one) improves flavor. Resting the dough in the fridge deepens the wheat and yeast notes while making the dough easier to handle.
Dimpling technique traps pockets of oil and herbs, giving focaccia its signature look and taste.
Shopping List
- All-purpose flour (4 cups / 500 g)
- Warm water (2 cups / 480 ml, around 100°F/38°C)
- Instant or active dry yeast (2 1/4 tsp / 7 g)
- Granulated sugar or honey (1 tsp) to feed the yeast
- Kosher salt (2 tsp for dough, plus flaky salt for topping)
- Extra-virgin olive oil (1/3 cup for dough, plus more for pan and topping)
- Fresh garlic (3–4 cloves, finely minced)
- Fresh herbs (2–3 tbsp chopped rosemary, thyme, and/or parsley)
- Optional toppings: cherry tomatoes, thin red onion, olives, grated Parmesan, crushed red pepper
Step-by-Step Instructions
- Bloom the yeast (if using active dry): In a large bowl, mix warm water with sugar or honey and sprinkle in the yeast. Let it sit for 5–10 minutes until foamy.If using instant yeast, you can skip blooming and add it directly to the flour.
- Make the dough: Add flour and salt to the bowl. Mix with a wooden spoon or spatula until a shaggy dough forms. Drizzle in 2 tablespoons of olive oil and fold to combine.The dough will be sticky—this is good.
- First rise: Cover the bowl with plastic wrap or a damp towel and let it rise at room temperature for 60–90 minutes, or until doubled.
- Optional cold ferment for flavor: For deeper flavor and better structure, transfer the covered dough to the fridge for 8–24 hours after the first 30–60 minutes of rising. If you do this, let it warm up for 30–45 minutes before the next step.
- Prepare the pan: Generously coat a 9×13-inch baking pan or a large sheet pan with 2–3 tablespoons of olive oil. Don’t skimp; this creates a crisp, well-fried bottom.
- Stretch and rest: Turn the dough into the pan.With oiled hands, gently stretch it toward the edges. If it springs back, let it rest for 10 minutes, then stretch again. Repeat until it reaches the corners or nearly fills the pan.
- Make garlic-herb oil: In a small bowl, mix 3 tablespoons olive oil with minced garlic and the chopped herbs.Let it sit while the dough rests to infuse the oil.
- Second rise: Cover the pan lightly and let the dough puff for 30–45 minutes, until slightly jiggly and airy.
- Dimple and top: Preheat the oven to 425°F (220°C). With well-oiled fingers, press straight down into the dough to make deep dimples all over—don’t be shy. Spoon the garlic-herb oil evenly over the surface.Sprinkle with flaky salt. Add any optional toppings.
- Bake: Bake for 20–25 minutes, until the top is golden and the edges are crisp. If you like deeper color, go to 27–30 minutes, watching closely.
- Finish with oil: Right out of the oven, brush or drizzle a little more olive oil over the top for shine and flavor.Cool in the pan for 10 minutes, then transfer to a rack.
- Serve: Cut into squares or strips. Serve warm on its own, with soup, or alongside a simple salad.
Storage Instructions
Room temperature: Wrap loosely in parchment or store in a paper bag inside a plastic bag for 1–2 days. This keeps the crust from getting soggy.
Freezer: Cool completely, wrap tightly in plastic, then foil, and freeze for up to 2 months.
Thaw at room temperature, then re-crisp in a 350°F (175°C) oven for 8–10 minutes.
Reheating: For best texture, warm slices in a hot skillet with a touch of olive oil or bake at 375°F (190°C) for 5–7 minutes. Avoid the microwave—it softens the crust.
Health Benefits
Olive oil provides heart-friendly monounsaturated fats and antioxidants. It’s a flavorful alternative to butter-heavy breads.
Garlic and herbs bring antioxidants, anti-inflammatory compounds, and bold taste without extra salt.
Fresh herbs also add small amounts of vitamins A and K.
Homemade control means you decide the sodium and the toppings. You can use whole wheat flour for part of the total to add fiber if you like.
Common Mistakes to Avoid
- Too little oil: Skimping on oil makes a dry crumb and pale crust. Oil the pan well and finish with a drizzle after baking.
- Overworking the dough: You don’t need heavy kneading.Gentle mixing and proper rises create the right texture.
- Rushing the rises: If the dough hasn’t doubled or feels dense, give it more time. Temperature and yeast freshness matter.
- Shallow dimples: Press deeply to create the classic focaccia pockets. They hold oil and keep the crumb tender.
- Underseasoning: Use enough salt in the dough and finish with flaky salt on top.It brightens the flavors.
Recipe Variations
- Lemon herb: Add lemon zest to the garlic-herb oil and finish with a squeeze of lemon after baking.
- Tomato and basil: Press halved cherry tomatoes into the dough before baking. Finish with torn basil and a drizzle of balsamic glaze.
- Olive and onion: Scatter sliced kalamata olives and thin red onion on top. Add a pinch of oregano.
- Cheesy crust: Sprinkle grated Parmesan or pecorino in the last 5 minutes of baking for a salty, crisp top.
- Whole wheat boost: Swap up to 30% of the all-purpose flour with whole wheat flour.Add 1–2 tablespoons extra water if needed.
- Spicy herb: Add crushed red pepper to the topping oil and finish with a light drizzle of chili oil after baking.
FAQ
Can I make the dough the day before?
Yes. After it starts to rise, cover and refrigerate for up to 24 hours. Let it warm up 30–45 minutes before stretching in the pan.
What if I only have active dry yeast?
Bloom it in warm water with sugar first to ensure it’s active.
If it foams, proceed. If not, your yeast may be expired.
Why is my focaccia dense?
Common reasons are not enough rise time, cool room temperature, old yeast, or too much flour. Make sure the dough is well-hydrated and doubled before baking.
Can I use a cast iron skillet?
Absolutely.
A 12-inch cast iron skillet works well and gives a great crust. Oil it generously and watch the bake time, which may be slightly shorter.
Is bread flour better than all-purpose?
Bread flour can give a chewier texture with larger holes. All-purpose flour makes a softer crumb.
Both work, so use what you have.
How do I know it’s done baking?
The top should be golden with some deeper brown spots, and the edges should be crisp. If you tap the bottom, it should sound hollow.
Can I make it vegan?
It already is, as written. Just avoid cheese toppings, or use a plant-based alternative if you like.
In Conclusion
Garlic herb focaccia is the kind of bread that turns a simple meal into something special.
With a few pantry ingredients and plenty of olive oil, you get a tender, aromatic loaf that’s easy enough for a weeknight and worthy of guests.
Use the base recipe as your template, then play with toppings to suit the season or your mood. Once you make it at home, you’ll wonder why you ever bought it pre-made.
Printable Recipe Card
Want just the essential recipe details without scrolling through the article? Get our printable recipe card with just the ingredients and instructions.