Peanut Butter Nutella Swirl Brownies – Fudgy, Swirly, and Irresistible

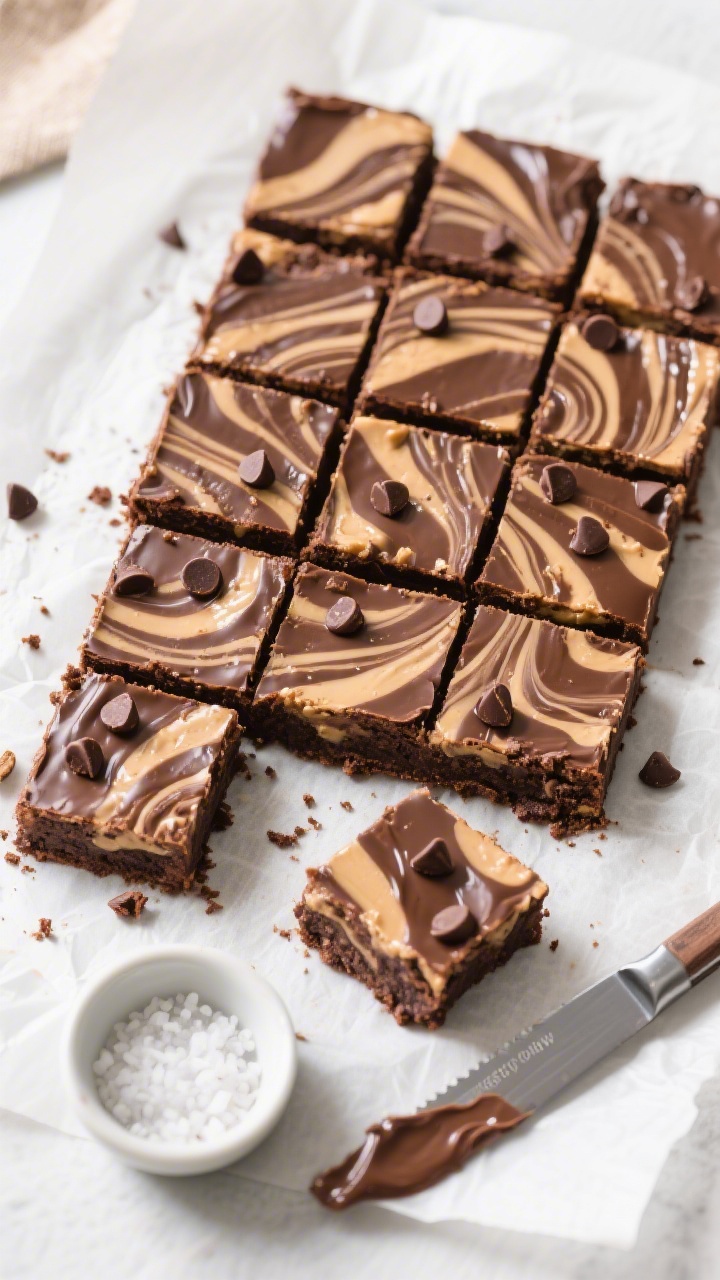
These brownies are unapologetically rich, beautifully swirled, and easy enough for a weeknight treat. You get the best of both worlds: deep, chocolatey brownie base with ribbons of creamy peanut butter and glossy Nutella throughout.
The texture lands between fudgy and chewy, with shiny swirls on top that look bakery-worthy without much effort.
If you love a sweet-salty balance and a strong chocolate payoff, this recipe has your name on it.
Peanut Butter Nutella Swirl Brownies
Ingredients
- 1/2 cup (113 g) unsalted butter
- 3/4 cup (150 g) granulated sugar
- 1/2 cup (100 g) packed light brown sugar
- 2 large eggs, room temperature
- 1 teaspoon vanilla extract
- 1/3 cup (35 g) unsweetened cocoa powder (natural or Dutch-process)
- 3/4 cup (95 g) all-purpose flour
- 1/2 teaspoon fine salt
- 1/2 teaspoon baking powder (optional for a slightly cakier edge; omit for ultra fudgy)
- 1/2 cup (90 g) chocolate chips or chopped chocolate (semi-sweet or dark)
- 1/3 cup (85 g) creamy peanut butter (not natural-style, for best swirl)
- 1/3 cup (100 g) Nutella or other chocolate-hazelnut spread
- 1–2 tablespoons milk or cream (as needed to loosen peanut butter/Nutella for swirling)
- Optional: flaky sea salt for finishing
Instructions
- Prepare the pan and oven: Heat the oven to 350°F (175°C). Line an 8-inch square pan with parchment, leaving overhang for easy lifting. Lightly grease the parchment.
- Melt the butter: In a microwave-safe bowl or small saucepan, melt the butter until just liquid, not sizzling. Let it cool for 2 minutes so it doesn’t scramble the eggs.
- Whisk in sugars: Add granulated and brown sugar to the butter and whisk until glossy and combined, about 30 seconds.
- Add eggs and vanilla: Whisk in eggs one at a time until the mixture thickens slightly and looks shiny. Stir in vanilla. This helps create that crinkly top.
- Mix dry ingredients: In a separate bowl, whisk cocoa powder, flour, salt, and baking powder (if using). Sift if your cocoa is clumpy.
- Combine wet and dry: Add the dry ingredients to the wet mixture. Stir gently with a spatula until just combined. Do not overmix.
- Fold in chocolate: Stir in the chocolate chips or chopped chocolate. The batter will be thick.
- Spread in pan: Scrape the batter into the prepared pan and smooth the top.
- Loosen the swirls: In two small bowls, warm peanut butter and Nutella separately for 10–15 seconds in the microwave. Stir in a splash of milk or cream if needed to reach a spoonable, drizzle-ready consistency.
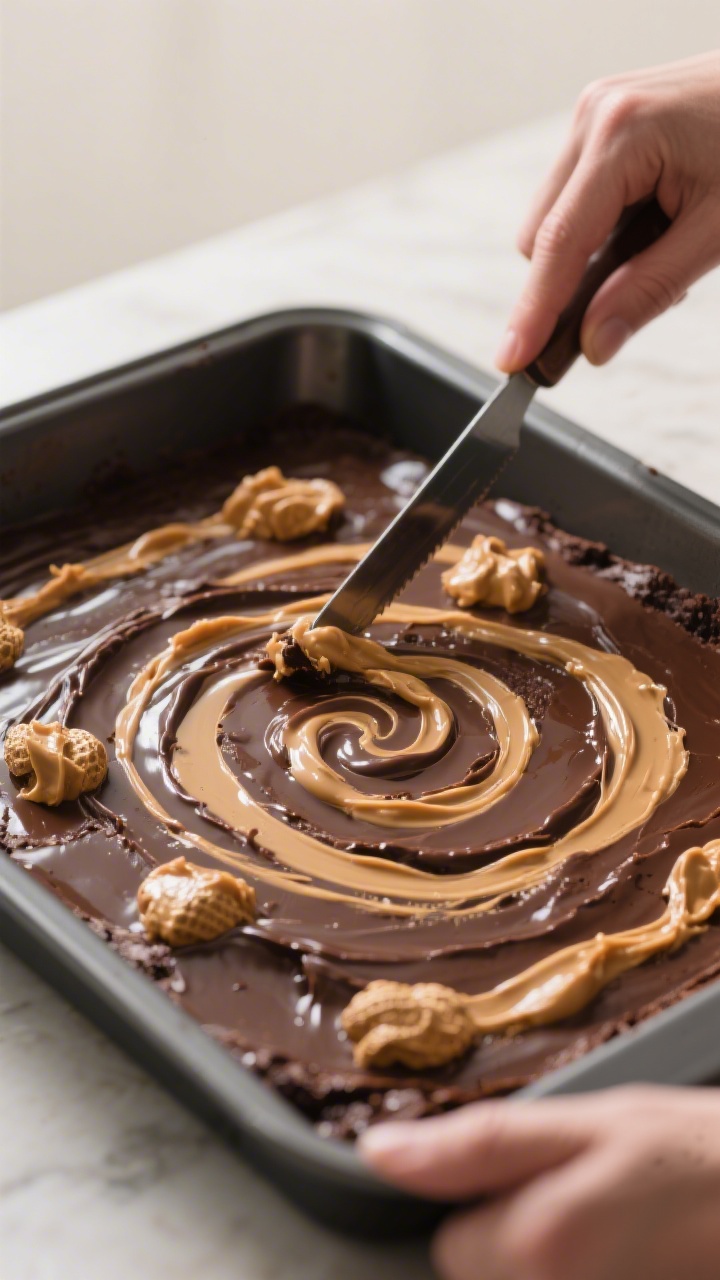
- Create the swirl: Dollop peanut butter and Nutella over the brownie batter in alternating spoonfuls. Use a butter knife or skewer to gently swirl, dragging in figure-eight motions. Don’t overmix—you want defined ribbons.
- Bake: Bake 22–28 minutes, depending on your oven and preferred texture. The edges should be set, and a toothpick inserted in the center should come out with moist crumbs, not wet batter.
- Cool completely: Place the pan on a rack and let the brownies cool fully, at least 1 hour. For clean cuts, chill for 30 minutes before slicing.
- Finish and serve: If using, sprinkle with flaky salt just after baking. Lift out, slice into 9 large or 16 smaller squares, and enjoy.
What Makes This Special
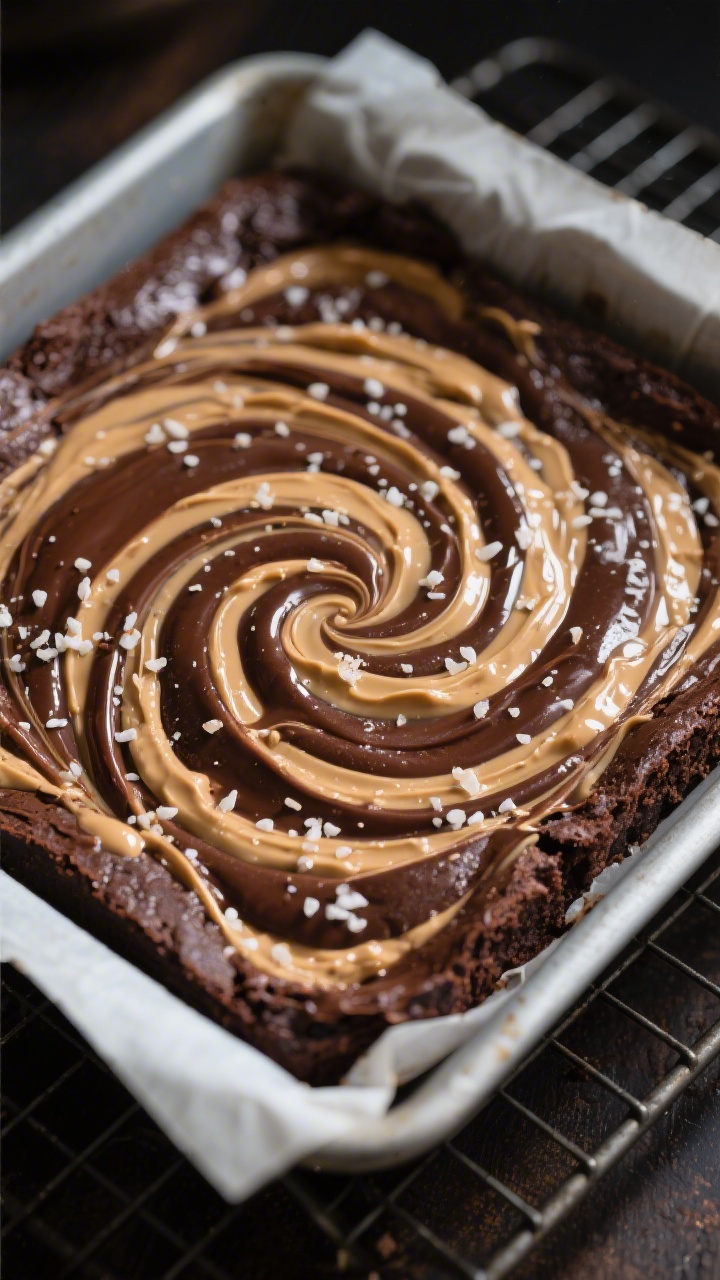
- Three flavors, one pan: Classic cocoa brownie, plus peanut butter and Nutella swirls for extra richness and contrast.
- Foolproof method: The batter comes together in one bowl, and the swirl technique is simple yet stunning.
- Perfect texture: Fudgy centers, set edges, and a shiny top from just the right sugar-to-fat balance.
- Customizable: Go fully indulgent or adjust sweetness and salt to taste. Add chopped nuts or a sprinkle of flaky salt.
- Crowd-pleaser: A surefire hit at potlucks, birthdays, or casual get-togethers.
Ingredients
- 1/2 cup (113 g) unsalted butter
- 3/4 cup (150 g) granulated sugar
- 1/2 cup (100 g) packed light brown sugar
- 2 large eggs, room temperature
- 1 teaspoon vanilla extract
- 1/3 cup (35 g) unsweetened cocoa powder (natural or Dutch-process)
- 3/4 cup (95 g) all-purpose flour
- 1/2 teaspoon fine salt
- 1/2 teaspoon baking powder (optional for a slightly cakier edge; omit for ultra fudgy)
- 1/2 cup (90 g) chocolate chips or chopped chocolate (semi-sweet or dark)
- 1/3 cup (85 g) creamy peanut butter (not natural-style, for best swirl)
- 1/3 cup (100 g) Nutella or other chocolate-hazelnut spread
- 1–2 tablespoons milk or cream (as needed to loosen peanut butter/Nutella for swirling)
- Optional: flaky sea salt for finishing
Instructions
- Prepare the pan and oven: Heat the oven to 350°F (175°C). Line an 8-inch square pan with parchment, leaving overhang for easy lifting.Lightly grease the parchment.
- Melt the butter: In a microwave-safe bowl or small saucepan, melt the butter until just liquid, not sizzling. Let it cool for 2 minutes so it doesn’t scramble the eggs.
- Whisk in sugars: Add granulated and brown sugar to the butter and whisk until glossy and combined, about 30 seconds.
- Add eggs and vanilla: Whisk in eggs one at a time until the mixture thickens slightly and looks shiny. Stir in vanilla.This helps create that crinkly top.
- Mix dry ingredients: In a separate bowl, whisk cocoa powder, flour, salt, and baking powder (if using). Sift if your cocoa is clumpy.
- Combine wet and dry: Add the dry ingredients to the wet mixture. Stir gently with a spatula until just combined.Do not overmix.
- Fold in chocolate: Stir in the chocolate chips or chopped chocolate. The batter will be thick.
- Spread in pan: Scrape the batter into the prepared pan and smooth the top.
- Loosen the swirls: In two small bowls, warm peanut butter and Nutella separately for 10–15 seconds in the microwave. Stir in a splash of milk or cream if needed to reach a spoonable, drizzle-ready consistency.
- Create the swirl: Dollop peanut butter and Nutella over the brownie batter in alternating spoonfuls.Use a butter knife or skewer to gently swirl, dragging in figure-eight motions. Don’t overmix—you want defined ribbons.
- Bake: Bake 22–28 minutes, depending on your oven and preferred texture. The edges should be set, and a toothpick inserted in the center should come out with moist crumbs, not wet batter.
- Cool completely: Place the pan on a rack and let the brownies cool fully, at least 1 hour. For clean cuts, chill for 30 minutes before slicing.
- Finish and serve: If using, sprinkle with flaky salt just after baking.Lift out, slice into 9 large or 16 smaller squares, and enjoy.
How to Store
- Room temperature: Store in an airtight container for up to 3 days. Place parchment between layers to protect the swirls.
- Refrigerator: Keeps well for 5–6 days and makes the brownies extra fudgy. Let sit at room temp for 10–15 minutes before serving.
- Freezer: Wrap individual squares tightly and freeze for up to 2 months.Thaw in the fridge overnight or at room temp for 1–2 hours.
Benefits of This Recipe
- Balanced sweetness: Semi-sweet chocolate and cocoa keep it rich without going overboard.
- Texture payoff: Butter, eggs, and sugar proportions deliver a fudgy center with chewy edges.
- No special equipment: One bowl, one whisk, one pan. That’s it.
- Make-ahead friendly: Flavor improves on day two, so it’s great for parties.
- Eye-catching: The swirl looks fancy but takes less than a minute.
Common Mistakes to Avoid
- Overbaking: Take them out when there are moist crumbs on the tester. Dry brownies usually mean a few minutes too long.
- Overmixing batter: Stir until just combined after adding dry ingredients to avoid tough or cakey results.
- Using natural peanut butter: It separates and can make greasy pockets.Use a stabilized, creamy peanut butter for defined swirls.
- Skipping the cool time: Cutting too soon leads to messy slices and can collapse the crumb. Let them set.
- Swirling too aggressively: Gentle figure-eights keep swirls distinct instead of blending into the batter.
Variations You Can Try
- Salted crunch: Add 1/2 cup roasted salted peanuts or hazelnuts to the batter for texture and a salty pop.
- Extra dark: Swap half the chocolate chips for chopped 70% dark chocolate and add 1 tablespoon espresso powder to the dry mix.
- Gluten-free: Substitute a 1:1 gluten-free baking flour blend. Let the batter rest 10 minutes before baking.
- Swirl swap: Try almond butter with Nutella or peanut butter with cookie butter for a toasty, spiced twist.
- Peanut butter cups: Fold in chopped mini peanut butter cups for pockets of melty filling.
- Brown butter: Brown the butter for a nutty depth.Let it cool slightly before adding sugars.
FAQ
Can I double the recipe for a 9×13-inch pan?
Yes. Double all ingredients and bake in a 9×13-inch pan at the same temperature. Start checking around 28–32 minutes; larger pans can bake a bit faster at the edges.
What if I only have natural peanut butter?
Stir it very well to reincorporate the oil, then whisk in 1–2 teaspoons powdered sugar to stabilize.
The swirl may not be as sharp, but it will still taste great.
Do I need both granulated and brown sugar?
You can use just granulated sugar, but the brown sugar adds moisture and chew. For the best texture, keep both.
How do I know when they’re done?
Look for set, slightly pulling-away edges and a center that doesn’t jiggle. A toothpick should come out with moist crumbs, not raw batter.
Can I make these without eggs?
Yes.
Replace each egg with 1/4 cup plain Greek yogurt or 3 tablespoons aquafaba plus 1 tablespoon oil. Expect a slightly denser crumb.
Why didn’t I get a shiny top?
Make sure you whisk the eggs and sugar until glossy and don’t skimp on sugar. Also avoid overmixing once the flour goes in.
Can I reduce the sugar?
You can cut up to 2 tablespoons from the granulated sugar, but too much reduction affects texture and the shiny crust.
Remember Nutella adds sweetness too.
What cocoa is best?
Either natural or Dutch-process works here. Dutch-process will give a smoother, darker chocolate flavor, while natural is a bit brighter.
In Conclusion
Peanut butter Nutella swirl brownies deliver big flavor with minimal fuss. The batter is simple, the swirl is quick, and the payoff is a pan of glossy, fudgy squares that feel special.
Keep the technique gentle, watch the bake time, and let them cool before slicing. Once you’ve made a batch, don’t be surprised if it becomes your go-to dessert for any occasion.
Printable Recipe Card
Want just the essential recipe details without scrolling through the article? Get our printable recipe card with just the ingredients and instructions.