Fire Wood Cookies – Rustic-Looking Chocolate Swirl Cookies

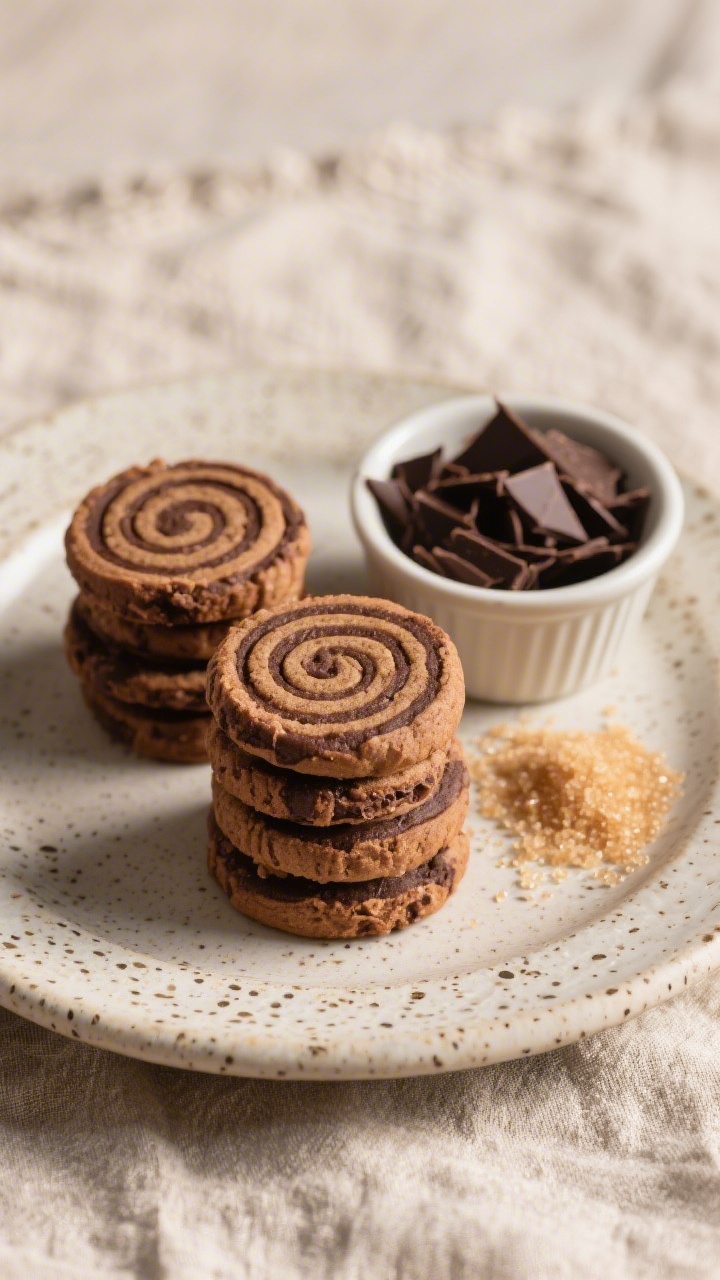
These eye-catching “fire wood cookies” are trending for a reason: they look like slices of stacked firewood, complete with charming rings and swirls.
The secret is a marbled dough that bakes into warm, woodgrain patterns with a glossy chocolate edge.
They’re simple to make, surprisingly forgiving, and perfect for gifting or dressing up a dessert board.
If you love cookies that wow at first glance and taste like a classic bakery treat, this recipe will be your new favorite.
Expect crisp edges, tender centers, and a cozy vanilla-cocoa aroma that feels like a winter cabin.

Trending Fire Wood Cookies
Ingredients
- 2 3/4 cups (345 g) all-purpose flour
- 1/2 teaspoon baking powder
- 1/2 teaspoon baking soda
- 1/2 teaspoon fine salt
- 3/4 cup (170 g) unsalted butter, softened
- 3/4 cup (150 g) granulated sugar
- 1/2 cup (100 g) packed light brown sugar
- 1 large egg + 1 egg yolk, room temperature
- 2 teaspoons pure vanilla extract
- 3 tablespoons unsweetened cocoa powder (natural or Dutch-process)
- 2 tablespoons milk (dairy or unsweetened non-dairy), divided
- Optional for “bark” edge: 1/3 cup mini chocolate chips or finely chopped dark chocolate
- Optional flavor twists: 1/2 teaspoon espresso powder or 1/2 teaspoon almond extract
Instructions
- Prep the basics: Line two baking sheets with parchment. Set butter and eggs out to reach room temperature. Preheat oven to 350°F (177°C) when ready to bake.
- Whisk dry ingredients: In a bowl, whisk flour, baking powder, baking soda, and salt until evenly combined.
- Cream the butter and sugars: In a large bowl, beat butter, granulated sugar, and brown sugar until light and fluffy, about 2–3 minutes. Scrape the bowl as needed.
- Add eggs and vanilla: Beat in the egg and egg yolk one at a time, then mix in vanilla. Blend until smooth and glossy.
- Bring in the dry mix: Add the flour mixture in two additions. Mix on low just until no dry streaks remain. Do not overmix.
- Split the dough: Divide the dough in half. To one half, add cocoa powder and 1 tablespoon milk (and espresso powder if using). To the vanilla half, add 1 tablespoon milk to keep textures even. Mix each half until smooth.
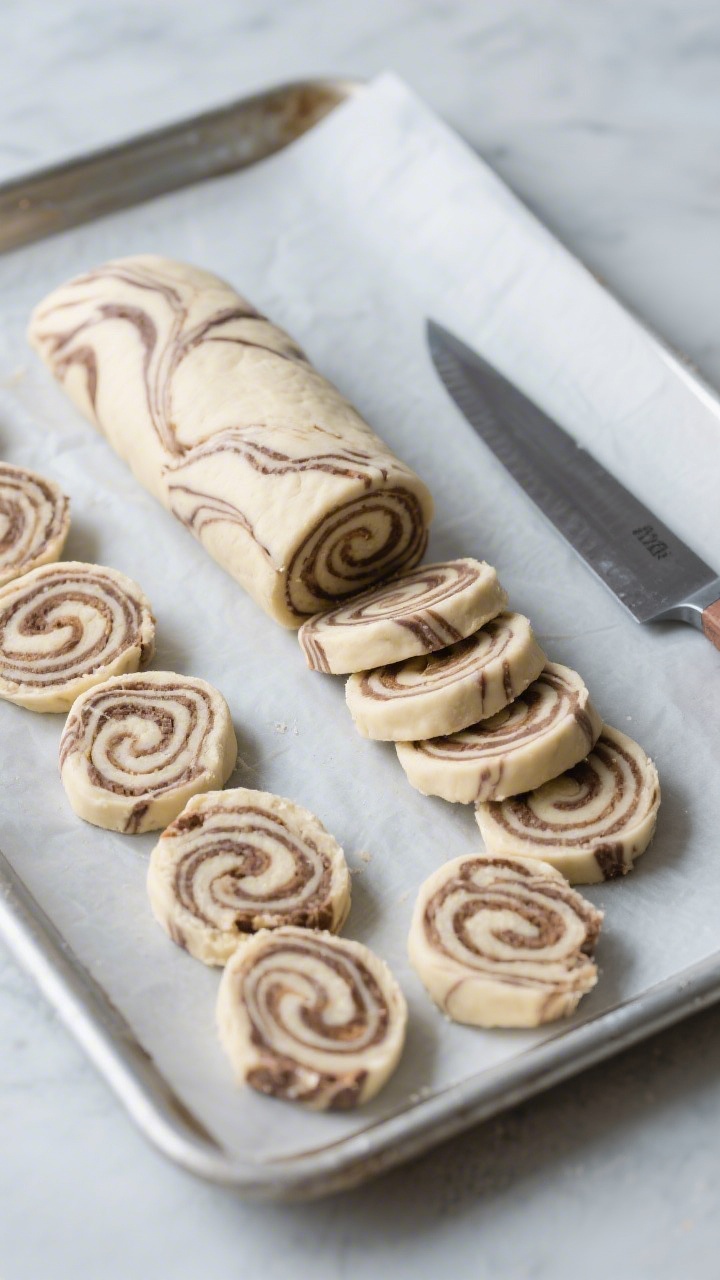
- Create woodgrain swirls: On a lightly floured surface, press each dough half into a rectangle (about 8×5 inches). Tear or cut each rectangle into 4–5 rough strips. Stack and alternate chocolate and vanilla strips, pressing lightly so they stick but keep some seams visible.
- Form logs: Gently roll the stacked dough into a log about 2 inches in diameter. Don’t overwork—irregular swirls create the wood look. If using the “bark” edge, roll the log in mini chocolate chips or chopped chocolate to coat the outside.
- Chill: Wrap logs tightly in plastic and chill for at least 2 hours, or freeze for 30–45 minutes until firm. Well-chilled dough slices cleanly and holds the pattern.
- Slice: Using a sharp knife, slice 1/4-inch rounds. If edges crack, nudge them back into shape. Place 2 inches apart on prepared sheets.
- Bake: Bake 9–12 minutes, until edges are set and just turning golden. The centers should look slightly soft. Rotate pans halfway for even baking.
- Cool: Let cookies rest on the sheet for 5 minutes, then move to a wire rack to finish cooling. The pattern becomes more defined as they set.
What Makes This Recipe So Good
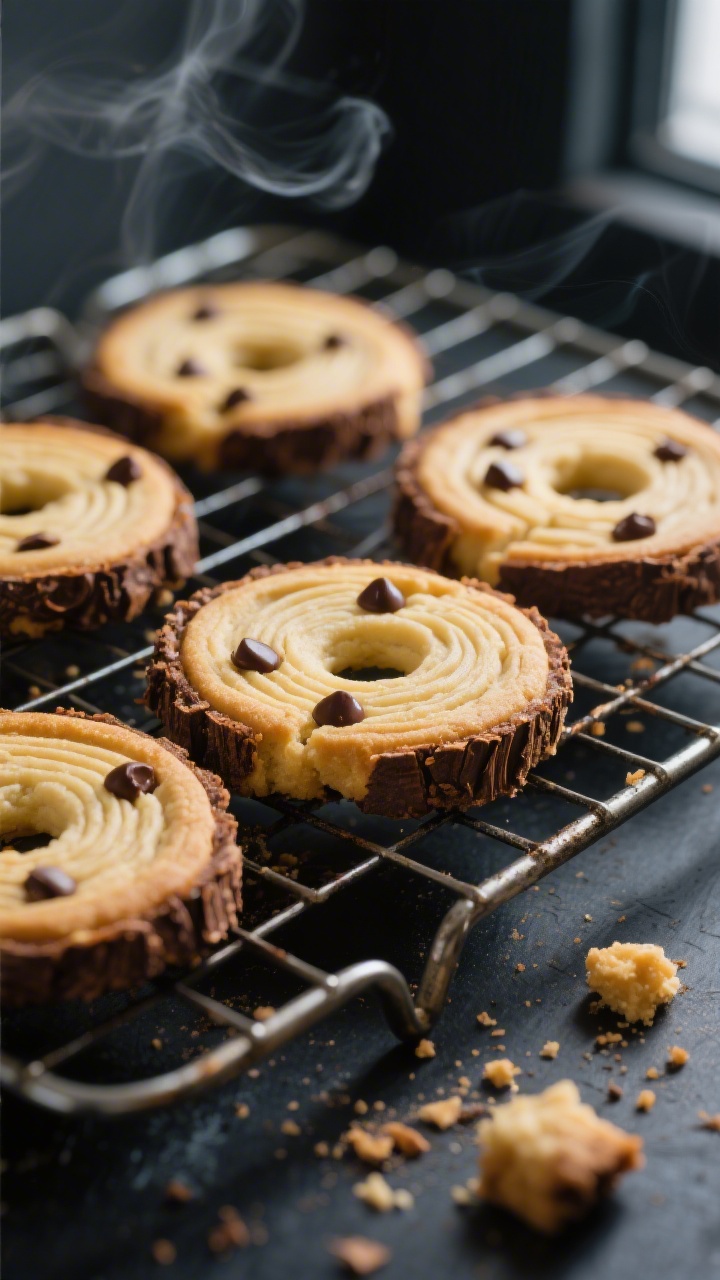
- Showstopping design: The woodgrain effect comes from rolling pale vanilla dough with chocolate dough. It looks fancy without special tools.
- Buttery, balanced flavor: You get a vanilla base with a mellow cocoa swirl and a hint of caramel from brown sugar.
- Easy slice-and-bake: Shape the dough into logs, chill, then slice into “wood” rounds whenever you need fresh cookies.
- Great texture: Crisp rims, soft middles, and a slight chew thanks to brown sugar and an extra egg yolk.
- Make-ahead friendly: The dough stores well, and the flavors deepen after a night in the fridge.
Ingredients
- 2 3/4 cups (345 g) all-purpose flour
- 1/2 teaspoon baking powder
- 1/2 teaspoon baking soda
- 1/2 teaspoon fine salt
- 3/4 cup (170 g) unsalted butter, softened
- 3/4 cup (150 g) granulated sugar
- 1/2 cup (100 g) packed light brown sugar
- 1 large egg + 1 egg yolk, room temperature
- 2 teaspoons pure vanilla extract
- 3 tablespoons unsweetened cocoa powder (natural or Dutch-process)
- 2 tablespoons milk (dairy or unsweetened non-dairy), divided
- Optional for “bark” edge: 1/3 cup mini chocolate chips or finely chopped dark chocolate
- Optional flavor twists: 1/2 teaspoon espresso powder or 1/2 teaspoon almond extract
Step-by-Step Instructions
- Prep the basics: Line two baking sheets with parchment. Set butter and eggs out to reach room temperature. Preheat oven to 350°F (177°C) when ready to bake.
- Whisk dry ingredients: In a bowl, whisk flour, baking powder, baking soda, and salt until evenly combined.
- Cream the butter and sugars: In a large bowl, beat butter, granulated sugar, and brown sugar until light and fluffy, about 2–3 minutes. Scrape the bowl as needed.
- Add eggs and vanilla: Beat in the egg and egg yolk one at a time, then mix in vanilla. Blend until smooth and glossy.
- Bring in the dry mix: Add the flour mixture in two additions. Mix on low just until no dry streaks remain. Do not overmix.
- Split the dough: Divide the dough in half.
To one half, add cocoa powder and 1 tablespoon milk (and espresso powder if using). To the vanilla half, add 1 tablespoon milk to keep textures even. Mix each half until smooth. - Create woodgrain swirls: On a lightly floured surface, press each dough half into a rectangle (about 8×5 inches).
Tear or cut each rectangle into 4–5 rough strips. Stack and alternate chocolate and vanilla strips, pressing lightly so they stick but keep some seams visible. - Form logs: Gently roll the stacked dough into a log about 2 inches in diameter. Don’t overwork—irregular swirls create the wood look.
If using the “bark” edge, roll the log in mini chocolate chips or chopped chocolate to coat the outside. - Chill: Wrap logs tightly in plastic and chill for at least 2 hours, or freeze for 30–45 minutes until firm. Well-chilled dough slices cleanly and holds the pattern.
- Slice: Using a sharp knife, slice 1/4-inch rounds. If edges crack, nudge them back into shape. Place 2 inches apart on prepared sheets.
- Bake: Bake 9–12 minutes, until edges are set and just turning golden. The centers should look slightly soft. Rotate pans halfway for even baking.
- Cool: Let cookies rest on the sheet for 5 minutes, then move to a wire rack to finish cooling. The pattern becomes more defined as they set.
Storage Instructions
- Room temperature: Store in an airtight container for 4–5 days. Add a slice of bread or a sugar cube to keep them soft.
- Refrigerator: Not necessary for baked cookies, but the dough can chill up to 72 hours. Flavor improves slightly.
- Freezer (dough): Freeze wrapped dough logs up to 2 months. Slice from frozen—add 1–2 minutes to bake time.
- Freezer (baked): Freeze baked cookies in layers with parchment up to 2 months. Thaw at room temperature 20–30 minutes.
Health Benefits
- Portion-friendly treat: Slice-and-bake cookies make it easy to control portion size. Bake only what you need.
- Cocoa perks: Unsweetened cocoa adds antioxidants and a rich flavor, so a little goes a long way.
- Customizable ingredients: You can reduce sugar slightly or use dark chocolate on the edge for deeper flavor with fewer added sugars.
- Mental wellness angle: Baking can be calming and creative, and sharing baked goods strengthens social bonds—both great for mood.
Common Mistakes to Avoid
- Overmixing the dough: This leads to tough cookies and muddled swirls.
Mix until just combined. - Skipping the chill: Warm dough loses its shape and the woodgrain look. Chill thoroughly before slicing.
- Cutting too thick or thin: Very thick cookies underbake in the center, very thin ones overbrown. Aim for 1/4 inch.
- Baking too long: Pull them when edges are set and centers look slightly soft.
They firm up as they cool. - Uniform rolling: Over-smoothing the log erases the rustic look. Keep gentle, uneven swirls for a natural “wood” pattern.
Alternatives
- Flavor swaps: Add almond extract to the vanilla half or orange zest to the chocolate half for a citrus-chocolate vibe.
- Spiced wood: Mix 1/2 teaspoon cinnamon and a pinch of nutmeg into the vanilla dough for a warm, chai-like note.
- Gluten-free: Use a 1:1 gluten-free all-purpose flour blend with xanthan gum. Chill longer for cleaner slices.
- Dairy-free: Substitute plant-based butter sticks and non-dairy milk.
Choose dairy-free chocolate for the “bark.” - Extra bark: Roll the dough log in turbinado sugar or finely chopped nuts instead of chocolate for crunch and sparkle.
Can I make the dough ahead of time?
Yes. Wrap the dough logs tightly and refrigerate up to 3 days or freeze up to 2 months. Slice and bake straight from the fridge or freezer.
Why did my swirls blend together?
Overmixing or kneading the two doughs too much can blur the pattern.
Stack and roll gently, and chill well before slicing to preserve clean lines.
How do I get perfect circles?
Chill the dough until firm, rotate the log after every few cuts, and use a sharp, thin knife. If slices look oblong, lightly reshape the edges with your fingers.
Can I reduce the sugar?
You can reduce total sugar by about 2–3 tablespoons without major texture changes. Any more and the cookies may turn drier and spread less.
What if I don’t have cocoa powder?
Use instant espresso powder (1–2 teaspoons) for a coffee swirl, or mix in 1–2 tablespoons of melted, cooled dark chocolate.
Adjust milk as needed to match dough consistency.
Do these cookies need frosting?
No. They’re designed to showcase the woodgrain. If you want extra shine, brush warm cookies lightly with a simple syrup or melted apricot jam.
How do I prevent spreading?
Make sure butter isn’t too soft, measure flour accurately, and chill the sliced rounds on the baking sheet for 10 minutes before they go into the oven.
Final Thoughts
Trending fire wood cookies deliver bakery-level looks with home-baker effort.
The marbled dough does the heavy lifting, and the slice-and-bake method makes timing easy, whether you’re prepping for a party or baking a few for yourself.
Keep the swirls rustic, don’t skip the chill, and pull them when the edges set.
You’ll get a tray of cookies that look like tiny logs, taste like classic vanilla-chocolate bliss, and disappear fast.
Printable Recipe Card
Want just the essential recipe details without scrolling through the article? Get our printable recipe card with just the ingredients and instructions.