Raisin Scones – Tender, Buttery, and Perfect for Tea

Raisin scones feel like a small luxury you can make any day of the week. They’re lightly sweet, pleasantly crumbly, and dotted with juicy raisins in every bite.
Whether you serve them warm with butter and jam or enjoy them plain alongside a cup of tea, they’re wonderfully satisfying.
This recipe is simple, reliable, and doesn’t ask for any special equipment. If you’ve never baked scones before, this is a great place to start.

Raisin Scones – Tender, Buttery, and Perfect for Tea
Ingredients
- All-purpose flour (2 cups / 250 g) – The base for structure.
- Granulated sugar (3 tbsp) – Adds light sweetness.
- Baking powder (2 1/2 tsp) – For lift and fluff.
- Kosher salt (1/2 tsp) – Balances flavor.
- Cold unsalted butter (6 tbsp / 85 g), cut into cubes – Creates flakiness and tenderness.
- Raisins (2/3 to 3/4 cup) – Use regular or golden; plump and sweet.
- Cold milk or buttermilk (1/2 cup / 120 ml), plus more as needed – Brings the dough together; buttermilk adds tang.
- Egg (1 large) – Adds richness and helps bind.
- Vanilla extract (1 tsp) – Rounds out the flavor.
- Cream or milk (1–2 tbsp) – For brushing the tops.
- Coarse sugar (optional, 1–2 tbsp) – For a crisp, sparkly finish.
- Optional add-ins: Orange or lemon zest (1 tsp), ground cinnamon (1/2 tsp), or a splash of rum to soak the raisins.
Instructions
- Prep and preheat. Heat your oven to 400°F (200°C). Line a baking sheet with parchment paper. Keep your butter and milk cold; cold fats are key for flaky scones.
- Mix dry ingredients. In a large bowl, whisk together the flour, sugar, baking powder, and salt until evenly combined. If using cinnamon or citrus zest, whisk it in now.
- Cut in the butter. Add the cold, cubed butter to the flour mixture. Use a pastry cutter or your fingertips to rub the butter into the flour until you have pea-sized bits. Some larger flakes are fine—those create layers.
- Add the raisins. Toss the raisins through the mixture so they’re coated in flour. This helps them distribute evenly without sinking.
- Combine wet ingredients. In a small bowl, whisk the egg, milk (or buttermilk), and vanilla. If your dough tends to be dry, set aside an extra tablespoon of milk to add if needed.
- Bring the dough together. Pour the wet mixture into the dry ingredients. Stir with a fork until it starts clumping. If it’s very crumbly, add the extra milk a teaspoon at a time. The dough should be slightly shaggy but hold together when pressed.
- Shape gently. Turn the dough onto a lightly floured surface. Pat it into a 1-inch-thick round, about 7–8 inches across. Avoid over-kneading—just press and fold once or twice to help it come together.
- Cut the scones. Use a sharp knife or bench scraper to cut the round into 8 wedges. For softer sides, you can also stamp out rounds with a 2 1/2-inch cutter (press straight down; don’t twist).
- Chill briefly (optional but helpful). Transfer the scones to the lined baking sheet and chill in the fridge for 10–15 minutes. This helps them keep their shape and rise higher.
- Brush and top. Brush the tops with cream or milk. Sprinkle with coarse sugar if you like a little crunch.
- Bake. Bake for 14–18 minutes, until the tops are golden and the edges look set. If you used a cutter for smaller scones, start checking at 12 minutes.
- Cool and serve. Let the scones rest on the tray for 5 minutes, then transfer to a rack. Serve warm with butter, jam, honey, or clotted cream.
What Makes This Special
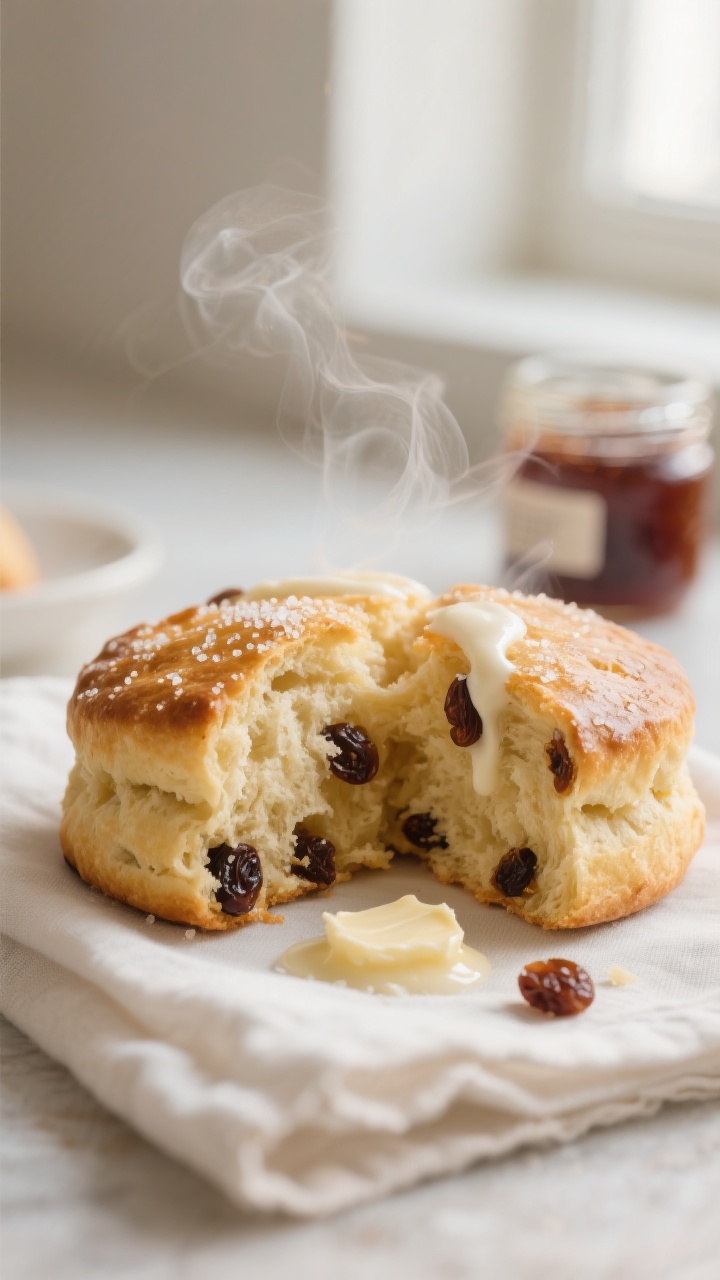
These raisin scones hit that sweet spot between tender and slightly crisp, thanks to cold butter and a gentle hand. The dough comes together quickly, and the ingredients are pantry staples, making this an easy weekend bake.
A touch of sugar keeps them balanced without turning them into dessert. The raisins add bursts of sweetness and chew, so every bite has some texture and flavor. Best of all, the method is forgiving, so you can get bakery-style results at home.
What You’ll Need
- All-purpose flour (2 cups / 250 g) – The base for structure.
- Granulated sugar (3 tbsp) – Adds light sweetness.
- Baking powder (2 1/2 tsp) – For lift and fluff.
- Kosher salt (1/2 tsp) – Balances flavor.
- Cold unsalted butter (6 tbsp / 85 g), cut into cubes – Creates flakiness and tenderness.
- Raisins (2/3 to 3/4 cup) – Use regular or golden; plump and sweet.
- Cold milk or buttermilk (1/2 cup / 120 ml), plus more as needed – Brings the dough together; buttermilk adds tang.
- Egg (1 large) – Adds richness and helps bind.
- Vanilla extract (1 tsp) – Rounds out the flavor.
- Cream or milk (1–2 tbsp) – For brushing the tops.
- Coarse sugar (optional, 1–2 tbsp) – For a crisp, sparkly finish.
- Optional add-ins: Orange or lemon zest (1 tsp), ground cinnamon (1/2 tsp), or a splash of rum to soak the raisins.
How to Make It
- Prep and preheat. Heat your oven to 400°F (200°C).
Line a baking sheet with parchment paper. Keep your butter and milk cold; cold fats are key for flaky scones.
- Mix dry ingredients. In a large bowl, whisk together the flour, sugar, baking powder, and salt until evenly combined. If using cinnamon or citrus zest, whisk it in now.
- Cut in the butter. Add the cold, cubed butter to the flour mixture.
Use a pastry cutter or your fingertips to rub the butter into the flour until you have pea-sized bits. Some larger flakes are fine—those create layers.
- Add the raisins. Toss the raisins through the mixture so they’re coated in flour. This helps them distribute evenly without sinking.
- Combine wet ingredients. In a small bowl, whisk the egg, milk (or buttermilk), and vanilla.
If your dough tends to be dry, set aside an extra tablespoon of milk to add if needed.
- Bring the dough together. Pour the wet mixture into the dry ingredients. Stir with a fork until it starts clumping. If it’s very crumbly, add the extra milk a teaspoon at a time.
The dough should be slightly shaggy but hold together when pressed.
- Shape gently. Turn the dough onto a lightly floured surface. Pat it into a 1-inch-thick round, about 7–8 inches across. Avoid over-kneading—just press and fold once or twice to help it come together.
- Cut the scones. Use a sharp knife or bench scraper to cut the round into 8 wedges.
For softer sides, you can also stamp out rounds with a 2 1/2-inch cutter (press straight down; don’t twist).
- Chill briefly (optional but helpful). Transfer the scones to the lined baking sheet and chill in the fridge for 10–15 minutes. This helps them keep their shape and rise higher.
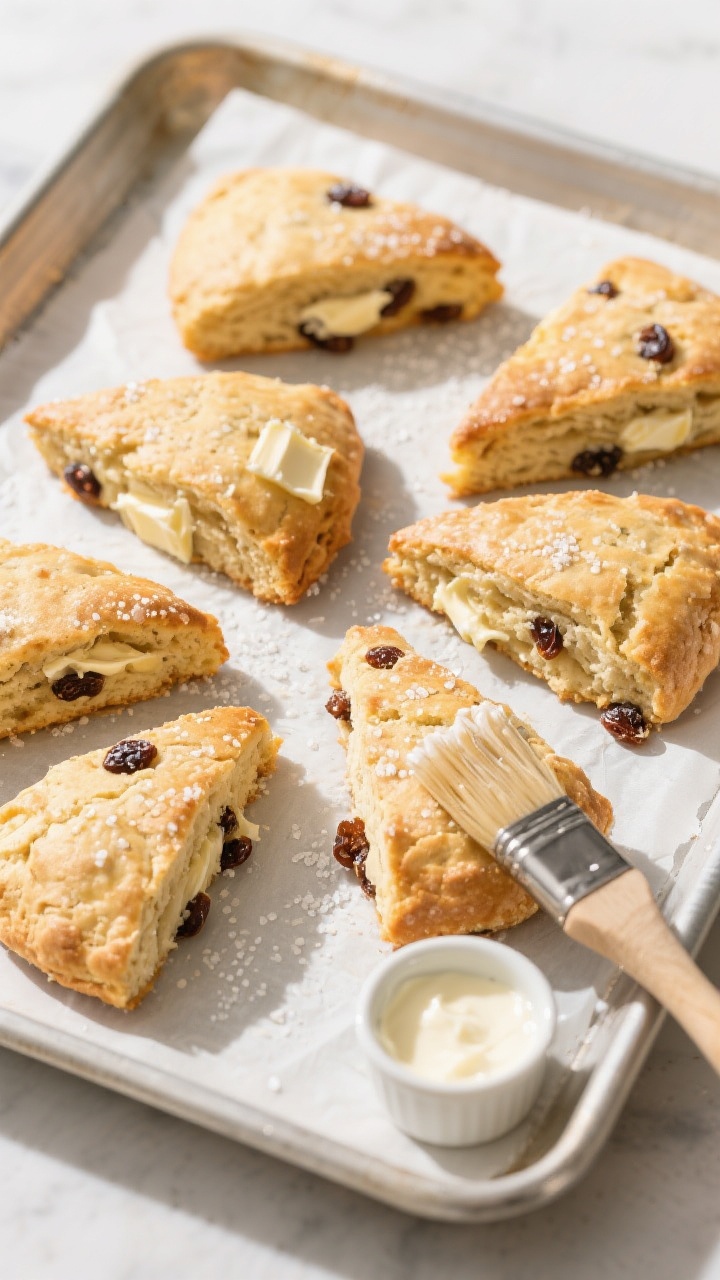
- Brush and top. Brush the tops with cream or milk. Sprinkle with coarse sugar if you like a little crunch.
- Bake. Bake for 14–18 minutes, until the tops are golden and the edges look set.
If you used a cutter for smaller scones, start checking at 12 minutes.
- Cool and serve. Let the scones rest on the tray for 5 minutes, then transfer to a rack. Serve warm with butter, jam, honey, or clotted cream.
Storage Instructions
These are best the day they’re baked, especially within the first few hours. To store, cool completely and keep in an airtight container at room temperature for up to 2 days.
For longer storage, freeze the baked scones: wrap individually, then place in a freezer bag for up to 2 months. Reheat frozen scones in a 325°F (165°C) oven for 10–12 minutes.
You can also freeze unbaked scones. Place shaped wedges on a tray, freeze until solid, then bag them.
Bake from frozen at 400°F (200°C) for 18–22 minutes, brushing with cream before baking.

Benefits of This Recipe
- Quick and simple: No special equipment or long prep time needed.
- Reliable texture: Cold butter and minimal mixing produce tender, flaky results.
- Flexible flavors: Easy to customize with citrus zest, spices, or different dried fruit.
- Make-ahead friendly: Freezes well, baked or unbaked.
- Great for sharing: A small batch that doubles easily for brunch or gatherings.
Common Mistakes to Avoid
- Overmixing the dough: This develops gluten and leads to tough scones. Stop as soon as it holds together.
- Warm butter: If the butter melts before baking, the scones spread and lose flakiness. Keep everything cold and chill before baking if your kitchen is warm.
- Too much flour: Scooping flour can pack it down. For accuracy, spoon flour into the cup and level it, or weigh it.
- Underbaking: Pale scones taste doughy. Look for golden tops and lightly browned bottoms.
- Raisins burning on the surface: Tuck any exposed raisins slightly into the dough before baking to prevent scorching.
Alternatives
- Currant Scones: Swap raisins for dried currants for smaller bursts of sweetness.
- Golden Raisins + Citrus: Use golden raisins and add orange zest for a brighter flavor.
- Spiced Version: Add 1/2 tsp cinnamon and a pinch of nutmeg. A drizzle of simple glaze after baking is nice here.
- Whole-Wheat Blend: Replace up to 1/2 cup of the flour with whole-wheat flour for a nutty note. Add a teaspoon more milk if the dough seems dry.
- Dairy-Free: Use a plant-based butter and non-dairy milk. The texture will be slightly different but still tender if you keep the fat cold.
- Gluten-Free: Use a cup-for-cup gluten-free flour blend that includes xanthan gum. The dough may be softer; chill it well before cutting.
Final Thoughts
Raisin scones are the kind of bake that feels cozy and special without any fuss. With cold butter, a light touch, and a hot oven, you’ll get tender, golden scones every time.
Keep this recipe handy for slow mornings, last-minute guests, or whenever you want a warm treat with your tea. Simple, satisfying, and reliably delicious — these scones are hard to beat.
FAQ
Do I need to soak the raisins first?
No, but it’s a nice upgrade. Soak the raisins in hot water, tea, or a splash of rum for 10 minutes, then drain and pat dry. This keeps them extra plump in the finished scones.
Can I make the dough ahead?
Yes. Shape the scones, place them on a tray, and refrigerate for up to 24 hours before baking. You can also freeze them unbaked and bake straight from frozen.
Why didn’t my scones rise?
Common reasons include warm butter, overmixed dough, or old baking powder. Make sure your baking powder is fresh, keep ingredients cold, and handle the dough as little as possible.
What’s the best way to cut scones?
For wedges, use a sharp knife and cut straight down without dragging. For rounds, use a floured biscuit cutter and press straight down — don’t twist, as twisting seals the edges and limits rise.
How can I tell they’re done?
The tops should be golden and the bottoms lightly browned. A toothpick in the center should come out clean or with a few moist crumbs. If in doubt, give them another 1–2 minutes.
Can I reduce the sugar?
Yes. You can drop the sugar to 2 tablespoons for a less sweet scone. The texture remains good, though the crust will brown slightly less.
What should I serve with raisin scones?
They’re great with butter, fruit preserves, honey, or clotted cream. For a savory touch, try salted butter to balance the sweetness of the raisins.
Printable Recipe Card
Want just the essential recipe details without scrolling through the article? Get our printable recipe card with just the ingredients and instructions.