Gluten Free Seeded Bread – Simple, Hearty, and Packed With Crunch

If you miss the satisfying crunch and nutty flavor of seeded bread, this gluten-free version brings it all back in one slice.
It’s wholesome, hearty, and surprisingly easy to make at home. The texture is soft but sturdy enough for toasting, sandwiches, or a thick swipe of butter.
No fancy equipment required—just a bowl, a loaf pan, and a good mix of seeds. Once you try it warm from the oven, it might become your new weekly bake.
Gluten Free Seeded Bread
Ingredients
- Dry ingredients: 2 cups (280 g) gluten-free flour blend (one that includes rice flour and starches, without added gum)
- 1/2 cup (60 g) almond flour or oat flour
- 1/4 cup (30 g) ground flaxseed (golden or brown)
- 3 tablespoons whole psyllium husk (or 1 tablespoon psyllium powder)
- 2 tablespoons sugar, honey, or maple syrup
- 2 teaspoons instant yeast
- 1 teaspoon fine sea salt
- Seeds (about 3/4 cup total): 2 tablespoons chia seeds
- 2 tablespoons sunflower seeds
- 2 tablespoons pumpkin seeds (pepitas)
- 2 tablespoons sesame seeds
- Optional: 1 tablespoon poppy seeds
- Wet ingredients: 1 1/2 cups (360 ml) warm water (about 105–110°F / 40–43°C)
- 2 tablespoons olive oil (plus extra for the pan)
- 1 teaspoon apple cider vinegar or lemon juice
- For topping (optional): Extra seeds for sprinkling
- Flaky sea salt
Instructions
- Prep the pan: Lightly oil a 9x5-inch loaf pan and line it with a parchment sling for easy removal. Set aside.
- Bloom the psyllium: In a medium bowl, whisk the warm water, olive oil, and vinegar. Sprinkle in the psyllium husk, whisk again, and let it sit for 2–3 minutes until it thickens into a gel. This step is key for structure.
- Mix the dry base: In a large bowl, combine the gluten-free flour blend, almond or oat flour, ground flaxseed, sugar, instant yeast, and salt. Whisk well so the yeast and salt are evenly distributed.
- Add the seeds: Stir in the chia, sunflower, pumpkin, sesame, and any optional poppy seeds. Reserve a small handful for topping if you like.
- Bring it together: Pour the psyllium gel into the dry ingredients. Use a sturdy spatula to mix until a thick, sticky dough forms. It should hold together but won’t feel like traditional wheat dough.
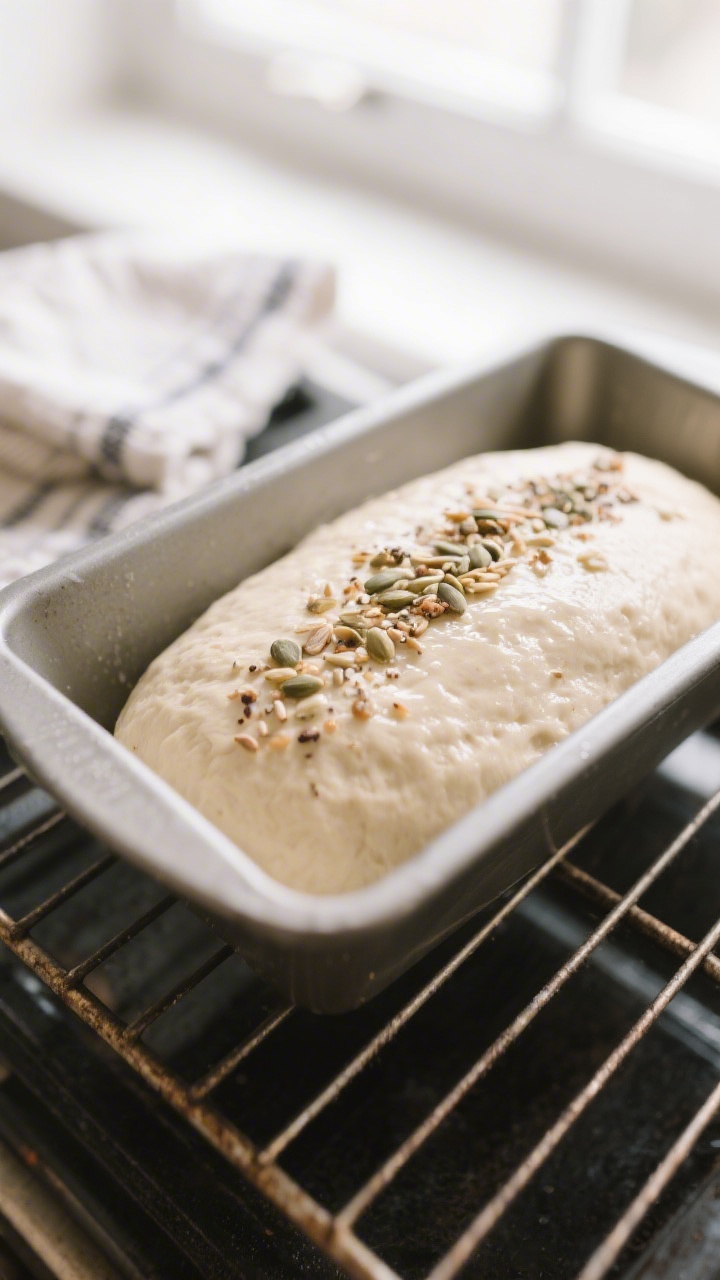
- Pan and smooth: Scrape the dough into the prepared loaf pan. Wet a spatula or your fingers to smooth the top. Sprinkle with the reserved seeds and a pinch of flaky salt if using.
- Proof: Cover the pan loosely with a clean towel. Let the dough rise in a warm spot for 35–55 minutes, or until it’s puffed by about 30–40%. Do not overproof—gluten-free dough won’t double like wheat dough.
- Preheat the oven: While the loaf proofs, preheat to 375°F (190°C). Place a rack in the lower-middle position.
- Bake: Bake for 45–55 minutes, until the top is deeply golden and the internal temperature reaches about 205–210°F (96–99°C). If the top browns too quickly, tent with foil for the last 10–15 minutes.
- Cool properly: Let the bread cool in the pan for 10 minutes, then transfer to a wire rack. Wait at least 1 hour before slicing so the crumb sets and stays moist.
What Makes This Special
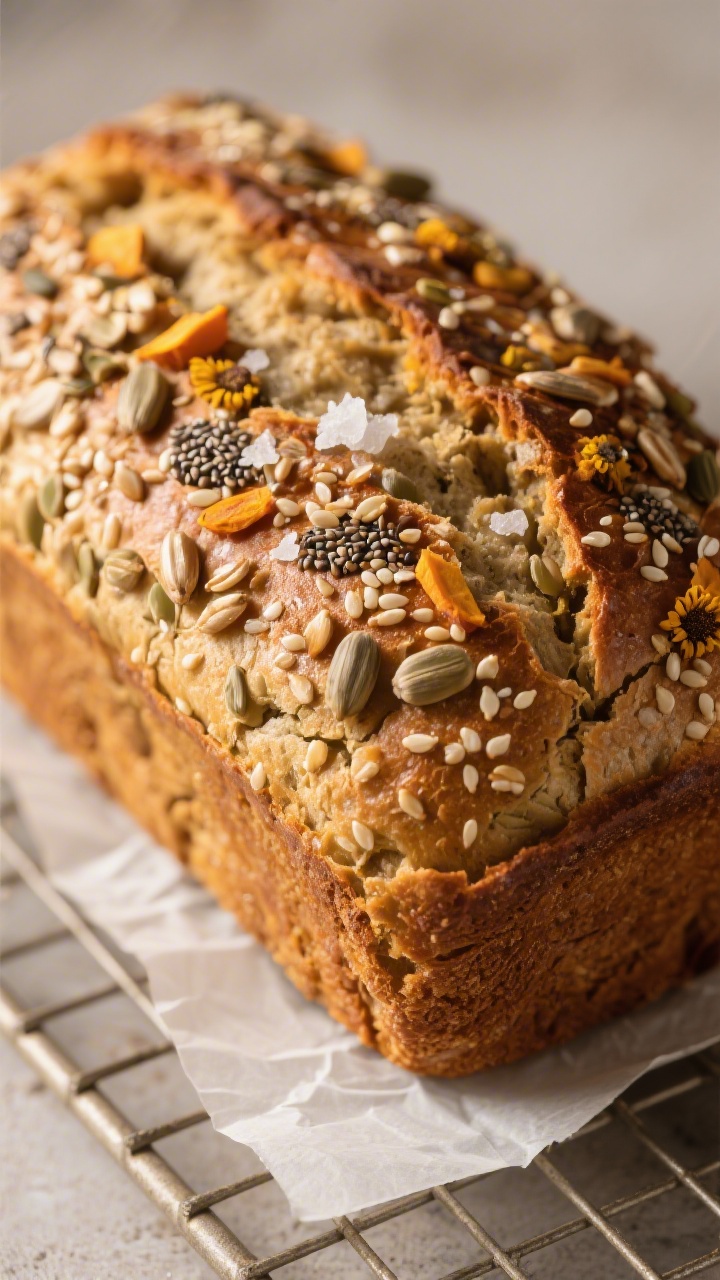
This bread blends a mix of gluten-free flours with whole seeds, so you get flavor, fiber, and crunch in every bite. It’s made with yeast, which gives it a better rise and a real bread-like structure without the gluten.
A touch of sweetness helps with browning and depth of flavor, while psyllium husk creates that classic chewy crumb. Best of all, the recipe is flexible—use the seeds you love and adjust the crustiness by tweaking the bake time.
What You’ll Need
- Dry ingredients:
- 2 cups (280 g) gluten-free flour blend (one that includes rice flour and starches, without added gum)
- 1/2 cup (60 g) almond flour or oat flour
- 1/4 cup (30 g) ground flaxseed (golden or brown)
- 3 tablespoons whole psyllium husk (or 1 tablespoon psyllium powder)
- 2 tablespoons sugar, honey, or maple syrup
- 2 teaspoons instant yeast
- 1 teaspoon fine sea salt
- Seeds (about 3/4 cup total):
- 2 tablespoons chia seeds
- 2 tablespoons sunflower seeds
- 2 tablespoons pumpkin seeds (pepitas)
- 2 tablespoons sesame seeds
- Optional: 1 tablespoon poppy seeds
- Wet ingredients:
- 1 1/2 cups (360 ml) warm water (about 105–110°F / 40–43°C)
- 2 tablespoons olive oil (plus extra for the pan)
- 1 teaspoon apple cider vinegar or lemon juice
- For topping (optional):
- Extra seeds for sprinkling
- Flaky sea salt
Instructions
- Prep the pan: Lightly oil a 9×5-inch loaf pan and line it with a parchment sling for easy removal. Set aside.
- Bloom the psyllium: In a medium bowl, whisk the warm water, olive oil, and vinegar.Sprinkle in the psyllium husk, whisk again, and let it sit for 2–3 minutes until it thickens into a gel. This step is key for structure.
- Mix the dry base: In a large bowl, combine the gluten-free flour blend, almond or oat flour, ground flaxseed, sugar, instant yeast, and salt. Whisk well so the yeast and salt are evenly distributed.
- Add the seeds: Stir in the chia, sunflower, pumpkin, sesame, and any optional poppy seeds.Reserve a small handful for topping if you like.
- Bring it together: Pour the psyllium gel into the dry ingredients. Use a sturdy spatula to mix until a thick, sticky dough forms. It should hold together but won’t feel like traditional wheat dough.
- Pan and smooth: Scrape the dough into the prepared loaf pan.Wet a spatula or your fingers to smooth the top. Sprinkle with the reserved seeds and a pinch of flaky salt if using.
- Proof: Cover the pan loosely with a clean towel. Let the dough rise in a warm spot for 35–55 minutes, or until it’s puffed by about 30–40%. Do not overproof—gluten-free dough won’t double like wheat dough.
- Preheat the oven: While the loaf proofs, preheat to 375°F (190°C).Place a rack in the lower-middle position.
- Bake: Bake for 45–55 minutes, until the top is deeply golden and the internal temperature reaches about 205–210°F (96–99°C). If the top browns too quickly, tent with foil for the last 10–15 minutes.
- Cool properly: Let the bread cool in the pan for 10 minutes, then transfer to a wire rack. Wait at least 1 hour before slicing so the crumb sets and stays moist.
Keeping It Fresh
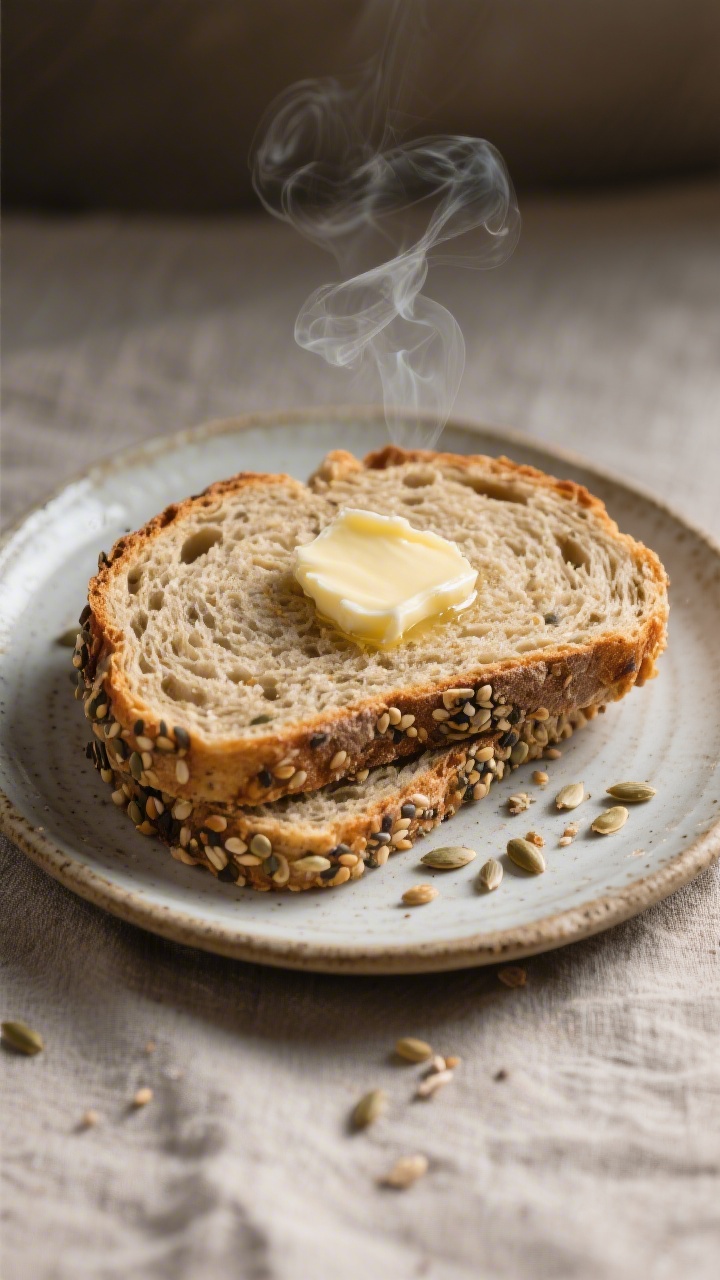
Once cooled, store the loaf at room temperature in an airtight container or wrapped in a clean towel for up to 2 days. For longer storage, slice the bread and freeze it in a zip-top bag with parchment between slices.
Toast straight from frozen for the best texture. Avoid the fridge—it dries out gluten-free bread quickly.
Health Benefits
- High in fiber: Seeds, flax, and psyllium support digestion and help keep you full longer.
- Healthy fats: Pumpkin, sunflower, and sesame seeds bring heart-friendly fats and a satisfying crunch.
- Steady energy: The mix of complex carbs, protein from seeds, and fiber helps steady blood sugar.
- Mineral-rich: Seeds add magnesium, zinc, and iron, which support metabolism and immunity.
- Gluten-free friendly: Suitable for those with celiac disease or gluten sensitivity when using certified gluten-free ingredients.
Common Mistakes to Avoid
- Skipping psyllium or flax: These binders are crucial for structure and a bouncy crumb.
- Overproofing: If it rises too long, the loaf can collapse in the oven. Look for a gentle puff, not a full double.
- Cutting too soon: Slicing hot bread releases steam and leads to a gummy texture.Let it cool.
- Using cold water: Yeast needs warmth to activate. Aim for warm—not hot—water.
- Ignoring pan size: A too-large pan makes a squat loaf; too small spills over. A standard 9×5 works best.
Alternatives
- No nuts option: Swap almond flour for more oat flour or sorghum flour in equal measure.
- Egg-free binding boost: This recipe is already egg-free.For extra tenderness, add 2 tablespoons olive oil or 1 tablespoon tahini.
- Whole-grain lift: Replace 1/2 cup of the gluten-free blend with buckwheat or sorghum flour for a deeper, earthy taste.
- Seed swaps: Use hemp hearts, chopped walnuts (if not nut-free), or nigella seeds. Keep total seeds around 3/4 cup.
- Sweetener choices: Use honey, maple syrup, or coconut sugar. A little sweetness helps browning and flavor.
- Yeast-free version: For a quick bread, use 2 teaspoons baking powder and 1/2 teaspoon baking soda, increase vinegar to 2 teaspoons, and skip proofing.The texture will be denser but still tasty.
FAQ
Can I make this without psyllium husk?
You can, but the texture changes. Replace psyllium with 2 extra tablespoons ground flaxseed and reduce the water by 2–3 tablespoons. The loaf will be more delicate and slightly crumbly.
Why is my bread gummy inside?
It likely needed more bake time or cooling.
Check internal temperature, aim for about 205–210°F, and let it cool at least an hour. Also avoid slicing while warm, which traps moisture in the crumb.
Which gluten-free flour blend works best?
A blend based on rice flour with tapioca and potato starch tends to rise well. If your blend already has xanthan gum, you can keep it, but still use psyllium for structure and moisture.
Can I knead this dough?
No traditional kneading is needed.
Mix until no dry spots remain. Gluten-free dough behaves more like a thick batter, so smoothing the top with wet hands is enough.
How do I get a crispier crust?
Bake the last 10 minutes out of the pan directly on the oven rack, or preheat a baking stone. A light spritz of water in the oven at the start also helps.
Is this bread suitable for a low-carb diet?
It’s lower in carbs than standard bread thanks to seeds and almond flour, but not strictly low-carb.
For fewer carbs, use more almond flour and seeds, and reduce the oat or rice-based blend slightly.
Can I use active dry yeast instead of instant?
Yes. Bloom 2 teaspoons active dry yeast in the warm water with the sweetener for 5–10 minutes until foamy. Then proceed with the recipe as written.
What’s the best way to slice it?
Use a sharp serrated knife once fully cool.
For extra-clean slices, chill the loaf for 20 minutes or slice from frozen and toast.
Wrapping Up
This gluten-free seeded bread brings texture, flavor, and nutrition together in a loaf you’ll actually want to bake every week. With a crunchy top and a soft, sturdy crumb, it’s perfect for toast, open-faced sandwiches, or soaking up soup. Keep the base the same, swap in your favorite seeds, and make it your own.
A little patience with proofing and cooling is all it takes for reliably great results at home.
Printable Recipe Card
Want just the essential recipe details without scrolling through the article? Get our printable recipe card with just the ingredients and instructions.